Behind the Build

Two more at the Hirshhorn Museum

Phew! It has been a busy 14+ months since I last posted. (14 months?! Oh my....) In that time, I’ve designed seven exhibitions of varying size and scope, four print projects, and three large production jobs. I am currently in early design development for an exciting project in Maine, and then there is the typical day-to-day of running a small design studio. Yep, just sitting around eating bon-bons.

In an attempt to get back into posting on The Exhibit Designer, I am kicking off with a book-end to my last post: two more exhibitions at the Hirshhorn Museum. These two were both located in the same gallery, and were on view one right after the other.

the-exhibit-designer_christine-lefebvre_Hirshhorn_Baselitz-escalator
the-exhibit-designer_christine-lefebvre_Hirshhorn_Baselitz-entrance

Baselitz: Six Decades ran from June 21, 2018 through September 16, 2018, then Rafael Lozano-Hemmer: Pulse opened in its place on November 1. Pulse is on view for another month, if you’d like to check it out.

the-exhibit-designer_christine-lefebvre_Hirshhorn_Pulse-entrance

The title treatment for Pulse played on the visual of the pulsing incandescent light bulbs hanging from the ceiling in Lozano-Hemmer’s installation Pulse Room …

the-exhibit-designer_christine-lefebvre_Hirshhorn_Pulse-detail

… while the title for Baselitz was a straight-forward title lockup. An early concept, in which “George” and “Baselitz” were alternately flipped upside down (Baselitz is known for his “inverted” paintings) was rejected, and I am a little sad for what could have been.

the-exhibit-designer_christine-lefebvre_baselitz-concept
the-exhibit-designer_christine-lefebvre_Hirshhorn_Baselitz-escalator2

In the end, the final title lockup and entry wall treatment created a neat refraction effect when ascending the escalator, as the letters reflected in the glass.

Post updated in January 2021 with minor text edits. This post was originally published at theexhibitdesigner.com on 25 March 2019.

The Utopian Projects and What Absence Is Made Of

The Markus Lüpertz exhibition I shared in my last post is no longer on view at the Hirshhorn — it came and went so quickly! — but the museum has two other exhibitions currently on view for which I designed the graphics. First, Ilya and Emilia Kabakov: The Utopian Projects:

the-exhibit-designer_christine-lefebvre_Hirshhorn_Kabakov-entrance
the-exhibit-designer_christine-lefebvre_Hirshhorn_Kabakov-entrance2

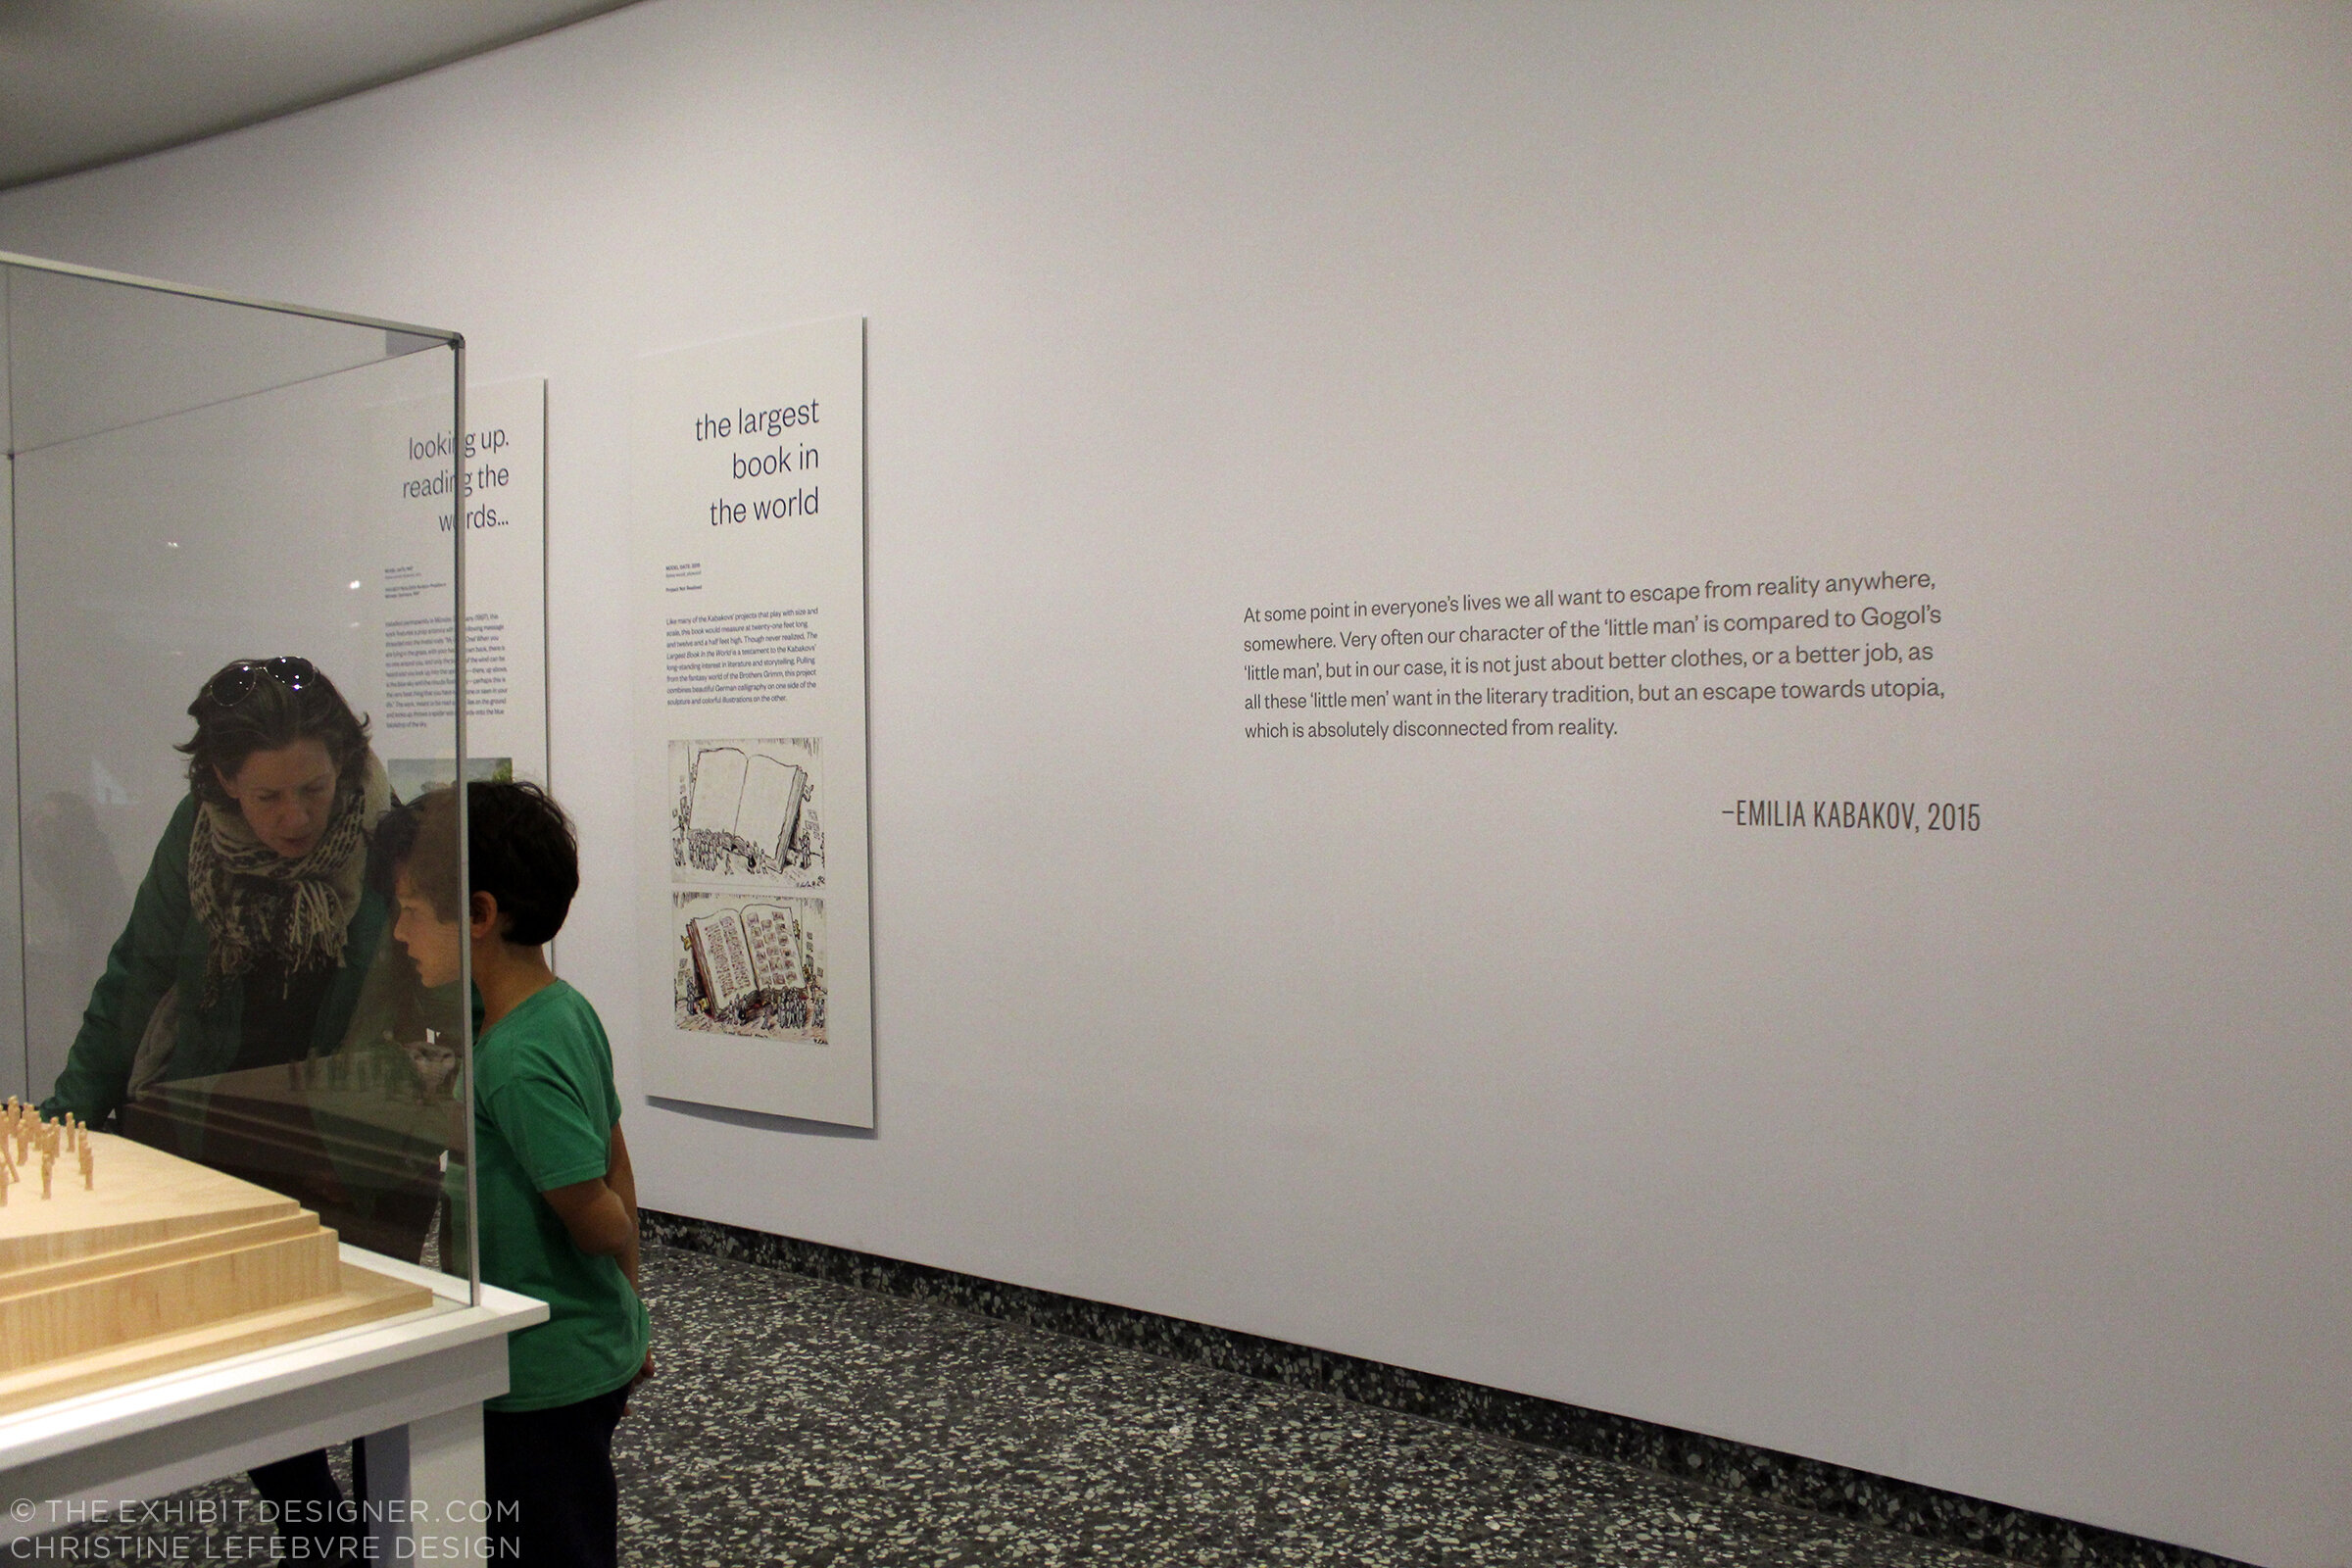
Working in collaboration with the museum’s design department, I designed the exhibition’s title wall, didactic graphics, and wall quotations.

The title wall graphic is printed on DreamScape’s self-adhesive wallcovering, Caviar texture. I like the print quality of DreamScape wallcoverings — I first spec’ed them for the exhibits at the FDR Museum, and have used them a few times since. The wallcovering was installed using butt seams. The installers (Blair, Inc. in Virginia, also the graphics fabricator) wrapped the wallcovering around the wall’s edges, a tricky detail that would have looked terrible if done poorly.

the-exhibit-designer_christine-lefebvre_Hirshhorn_Kabakov-exhibition2

The graphic panels are digital prints wrapped on sign blank with a matte over-laminate. They are hung on French cleats (simple but strong), which is an easy way to hang nearly anything. Also on the panels’ backsides is MDF blocking that provides rigidity for the sign blank fronts. Here’s a photo I snapped during installation, of the backsides:

the-exhibit-designer_christine-lefebvre_Hirshhorn_Kabakov-panel-backs
the-exhibit-designer_christine-lefebvre_Hirshhorn_Kabakov-quote
the-exhibit-designer_christine-lefebvre_Hirshhorn_Kabakov-exhibition1

The Utopian Projects is on view through March 4. The Kabakovs’ work is fascinating — their models are so cool. Check it out if you can!

The other exhibition at the Hirshhorn, for which I designed the graphics, is What Absence Is Made Of, on view through Summer 2019. For this exhibition I designed the title wall, didactics, and an exterior advertising poster for the National Mall.

the-exhibit-designer_christine-lefebvre_Hirshhorn_WAIMO-entrance

The curator requested reflective vinyl. In addition to layout experiments, I played with color combinations (silver on white? silver on black? on gray? which gray?). I love the way the selected title design looks in silver vinyl — it catches reflections and disappears, then reappears, as you walk by it.

the-exhibit-designer_christine-lefebvre_Hirshhorn_WAIMO-entrance2
the-exhibit-designer_christine-lefebvre_Hirshhorn_WAIMO-didactic

Post updated in January 2021 with minor text edits. Broken links have been fixed. This post was originally published at theexhibitdesigner.com on 5 January 2018.

Letters With Wings sneak peek at the National Postal Museum

If you stop by the Smithsonian National Postal Museum during the next couple of months, you’ll be able to see two exhibitions that I’ve designed. One is New York City: A Portrait Through Stamp Art (on view through May 14; full project view here); the other just opened.

theexhibitdesigner_NPM-FranklinFoyer

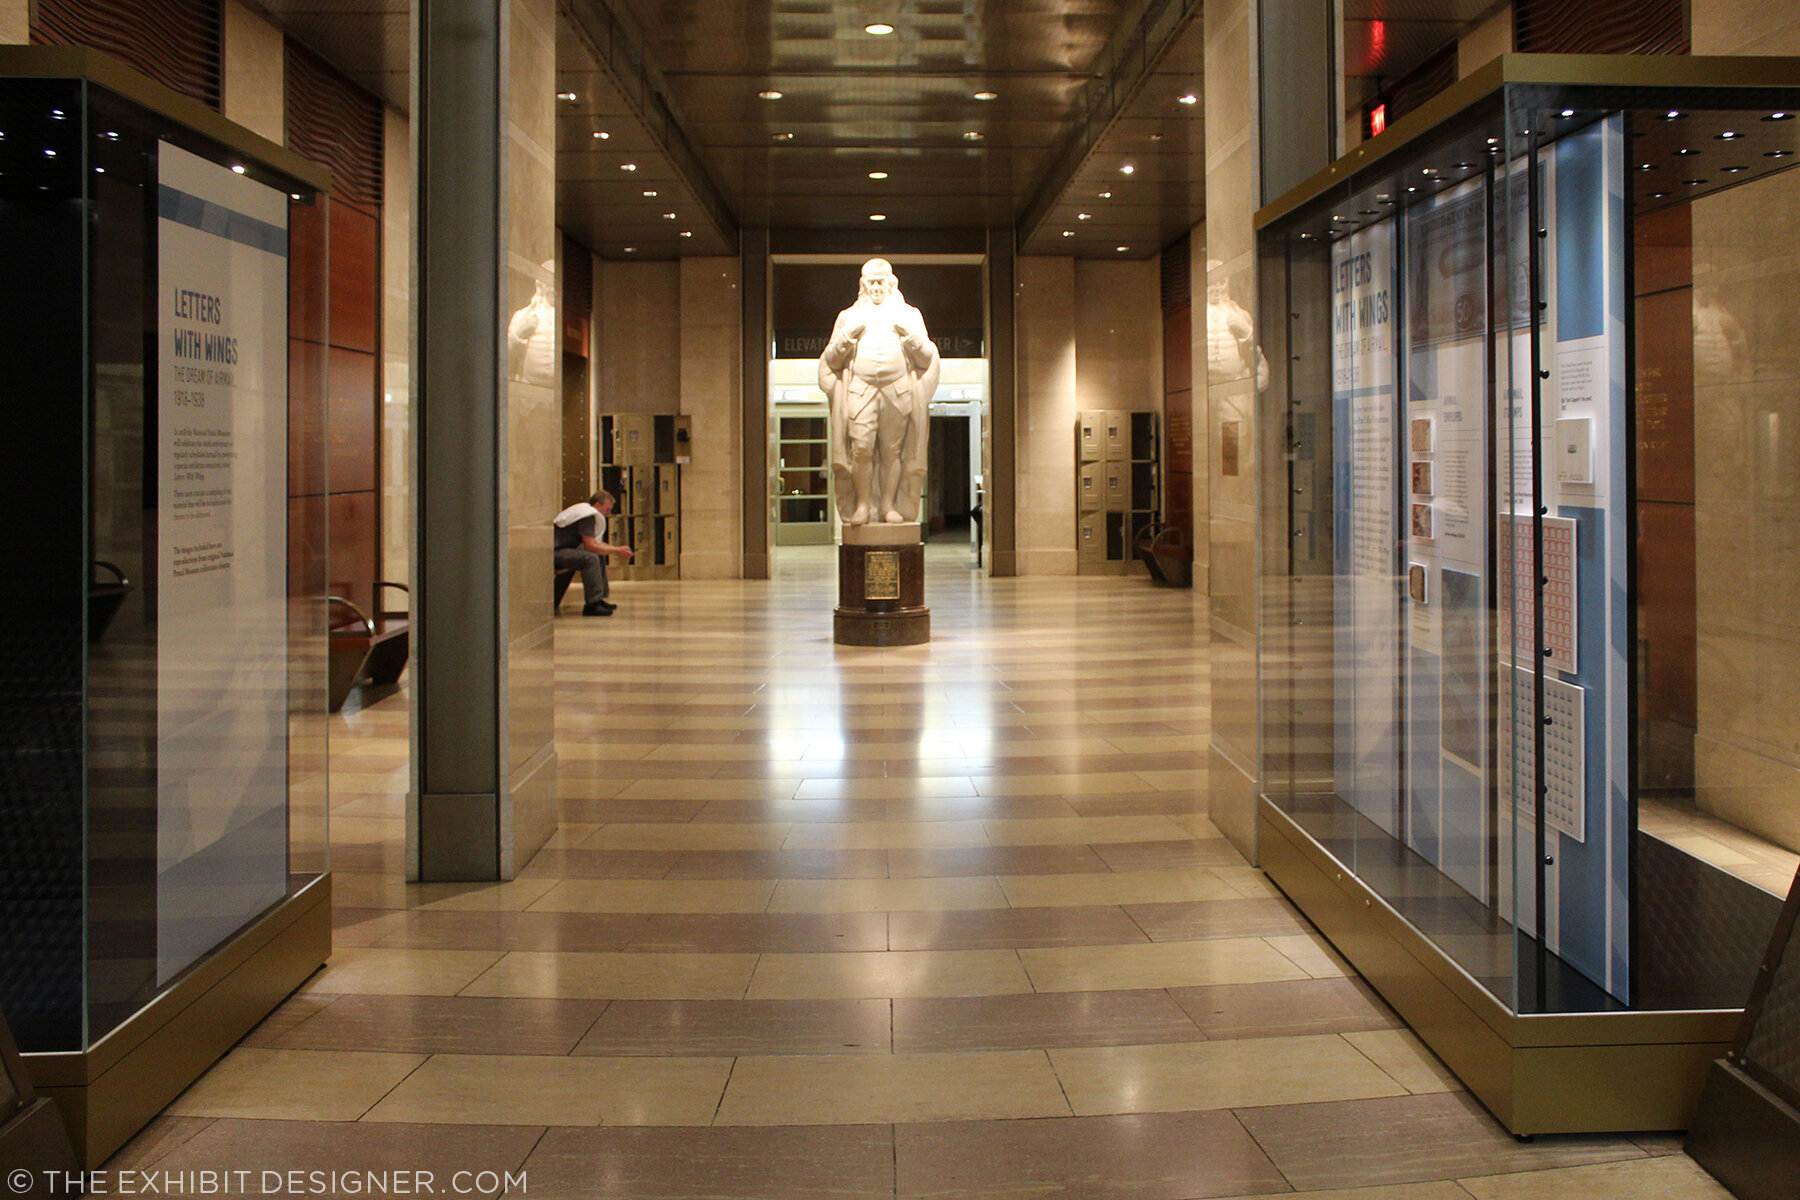
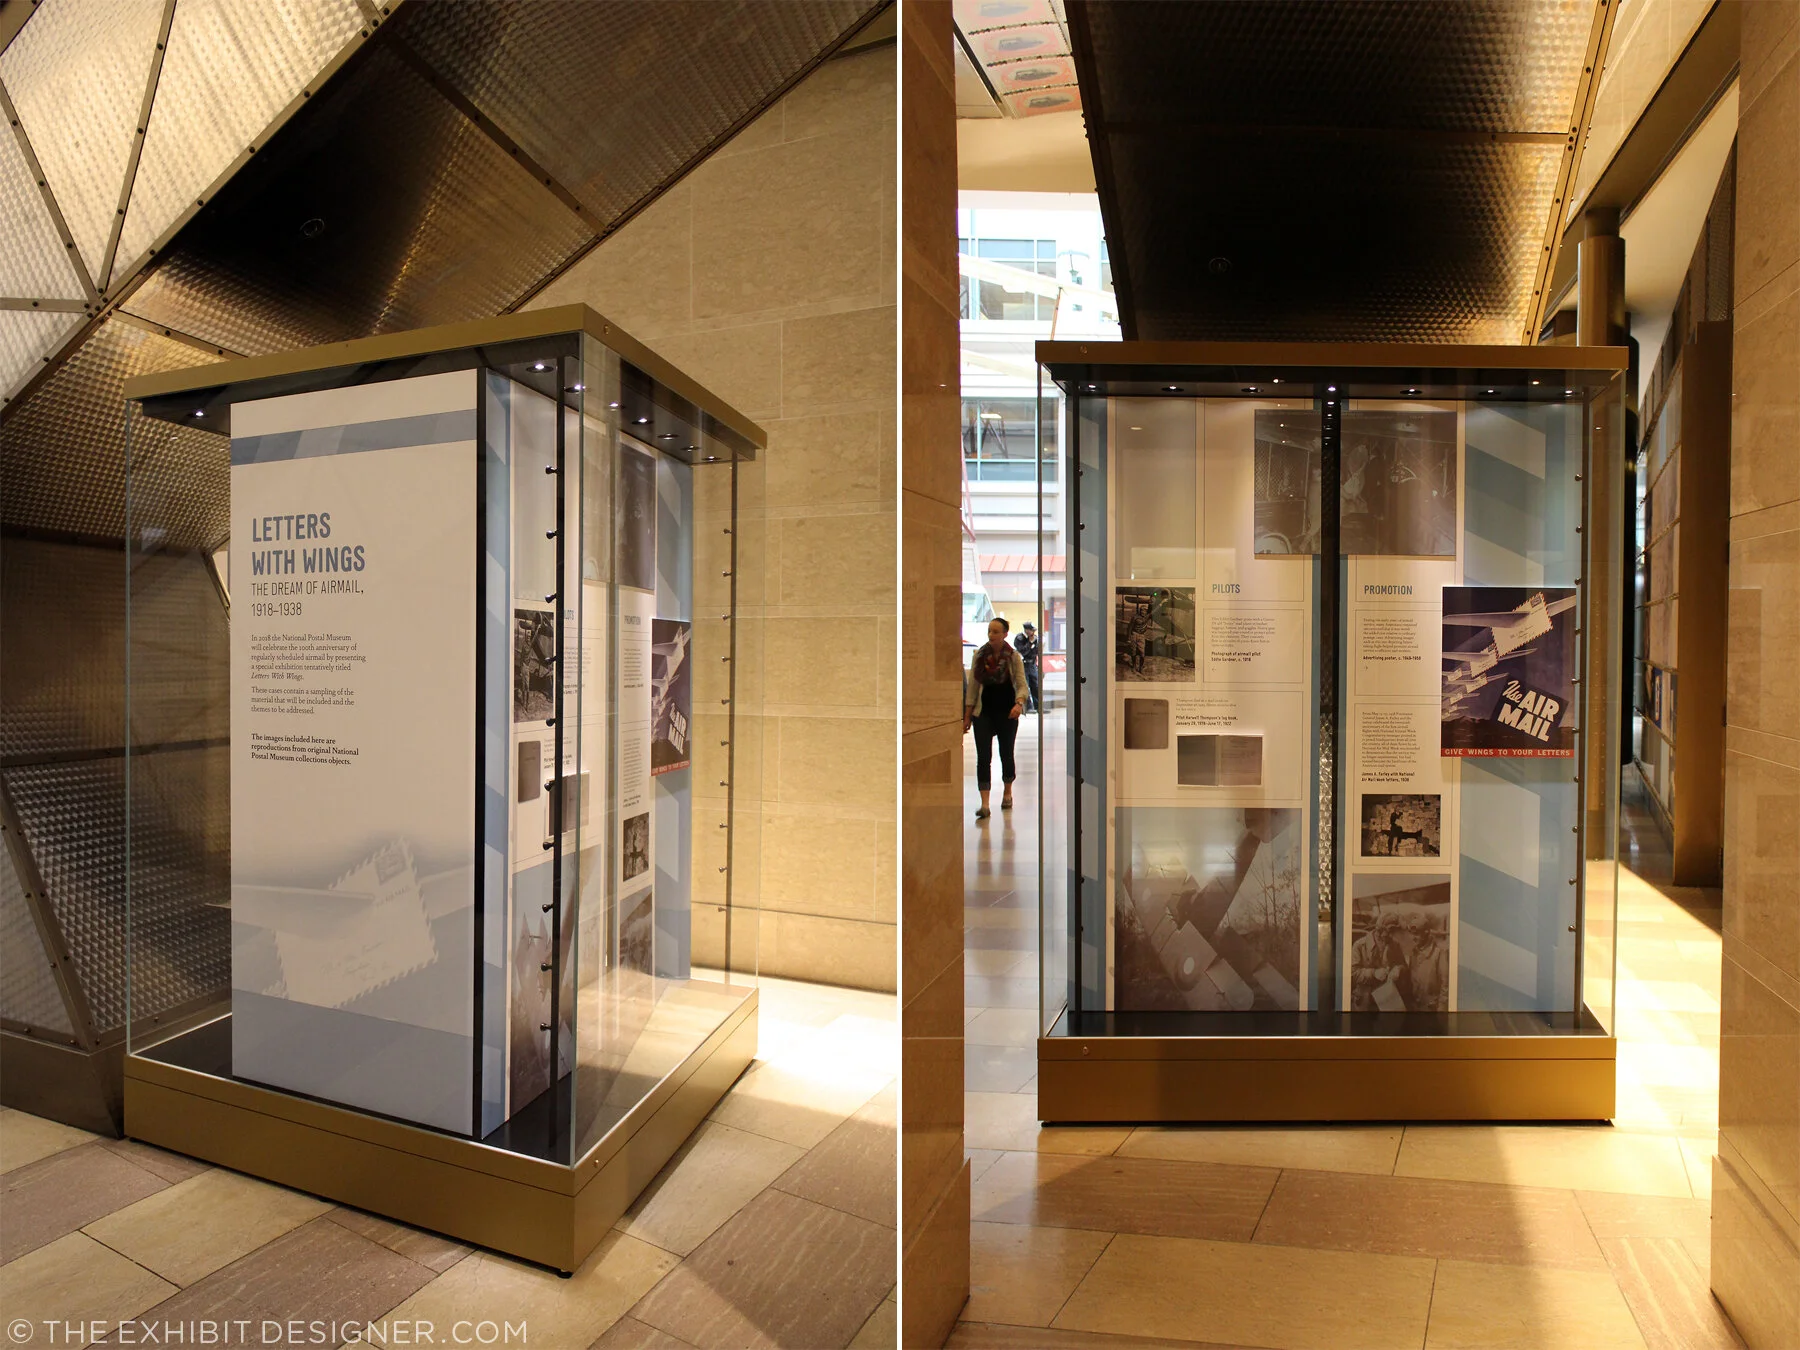
Beneath the museum’s escalators, in the Franklin Foyer, are two cases for temporary exhibitions. The museum intends to change these cases often with displays of recent acquisitions, favorite objects, niche subjects, and the like.

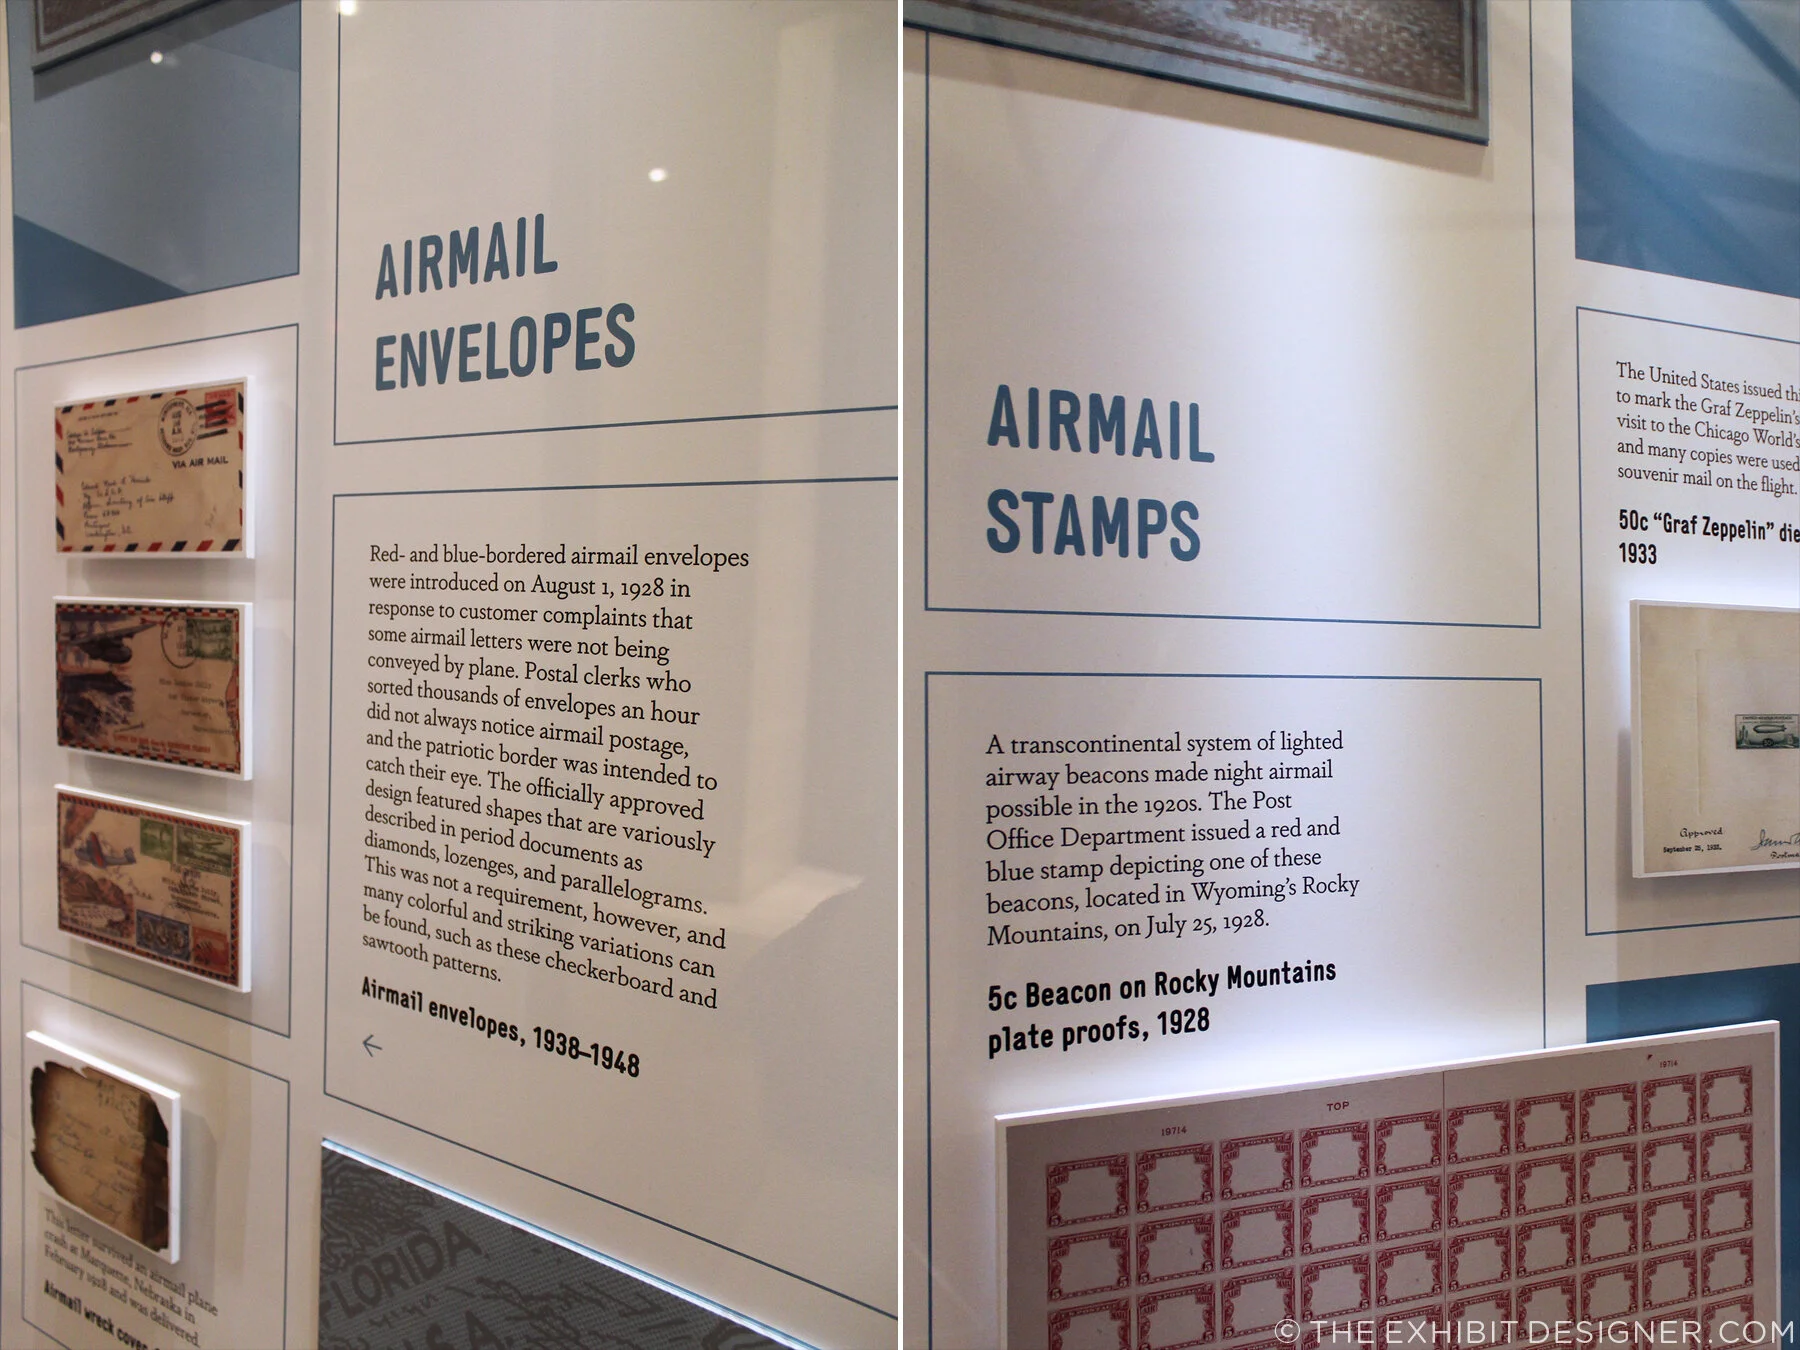
I created a design system for the museum’s in-house use when putting together these quick little exhibitions, and I designed the first exhibition to use the system: a “sneak peek” of an upcoming exhibition about WWII airmail tentatively called Letters With Wings.

theexhibitdesigner_NPM-FranklinFoyer_case1
theexhibitdesigner_NPM-FranklinFoyer_case2

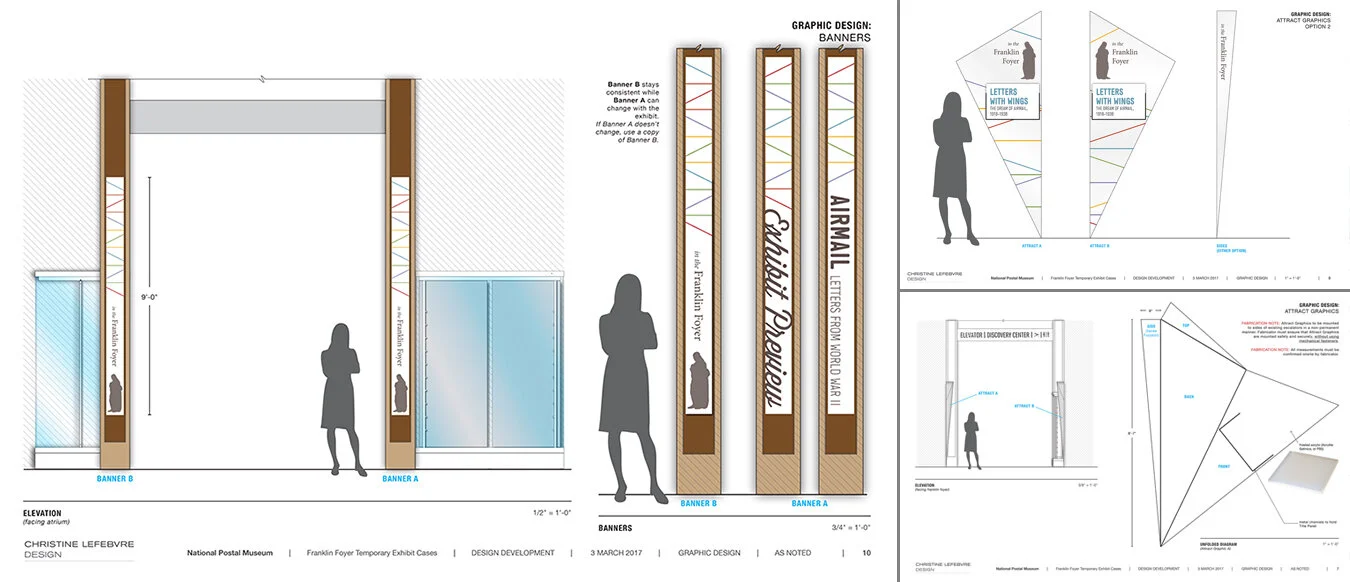
The design system included color palette, guidelines for layout of didactic and label graphics, sets of case furniture and graphic panels, and examples of case arrangements.

theexhibitdesigner_NPM-FranklinFoyer-system1
theexhibitdesigner_NPM-FranklinFoyer-system3

I also designed a series of banners and an “attract graphic” to brand the Franklin Foyer space. The attract graphic will be a geometric, cone-like acrylic structure with a changeable title panel; two will be installed in the open triangles of space between the artifact cases and the undersides of the escalators. (You can see the “open triangles of space” in the photos above.) They will protrude slightly into the space, above head level, and draw visitors’ attention from the atrium space. They’re not currently installed, but I look forward to seeing them there in the future.

theexhibitdesigner_NPM-FranklinFoyer-system2-1

There are no physical artifacts in either case of the currently installed exhibition, so objects are represented as printed graphics. (Docents will occasionally bring out the real objects for visitors, which are being prepared for the larger exhibition.) The printed representations are mounted to sintra (a lightweight, yet rigid, PVC sheet) to give them depth.

theexhibitdesigner_NPM-FranklinFoyer_case1_details2.jpg
theexhibitdesigner_NPM-FranklinFoyer_case1_details

If you’re in the Washington, DC area, please check out this little exhibition — and New York Stamp Art, too — while they’re still on view!

theexhibitdesigner_NPM-FranklinFoyer_case1_2

Post updated in January 2021 with minor text edits. Broken links have been fixed. This post was originally published at theexhibitdesigner.com on 28 March 2017.

Pacific Exchange, open at the National Postal Museum

Work shown was completed while I was a designer at Gallagher & Associates.

It’s open! Okay, old news. It opened well over a month ago, on March 6. I had also planned to post about the opening reception, but that was March 20, so — old news there as well. In any case, the reception was lovely, with Chinese food served and tinkling glassware and everyone dressed quite nicely.

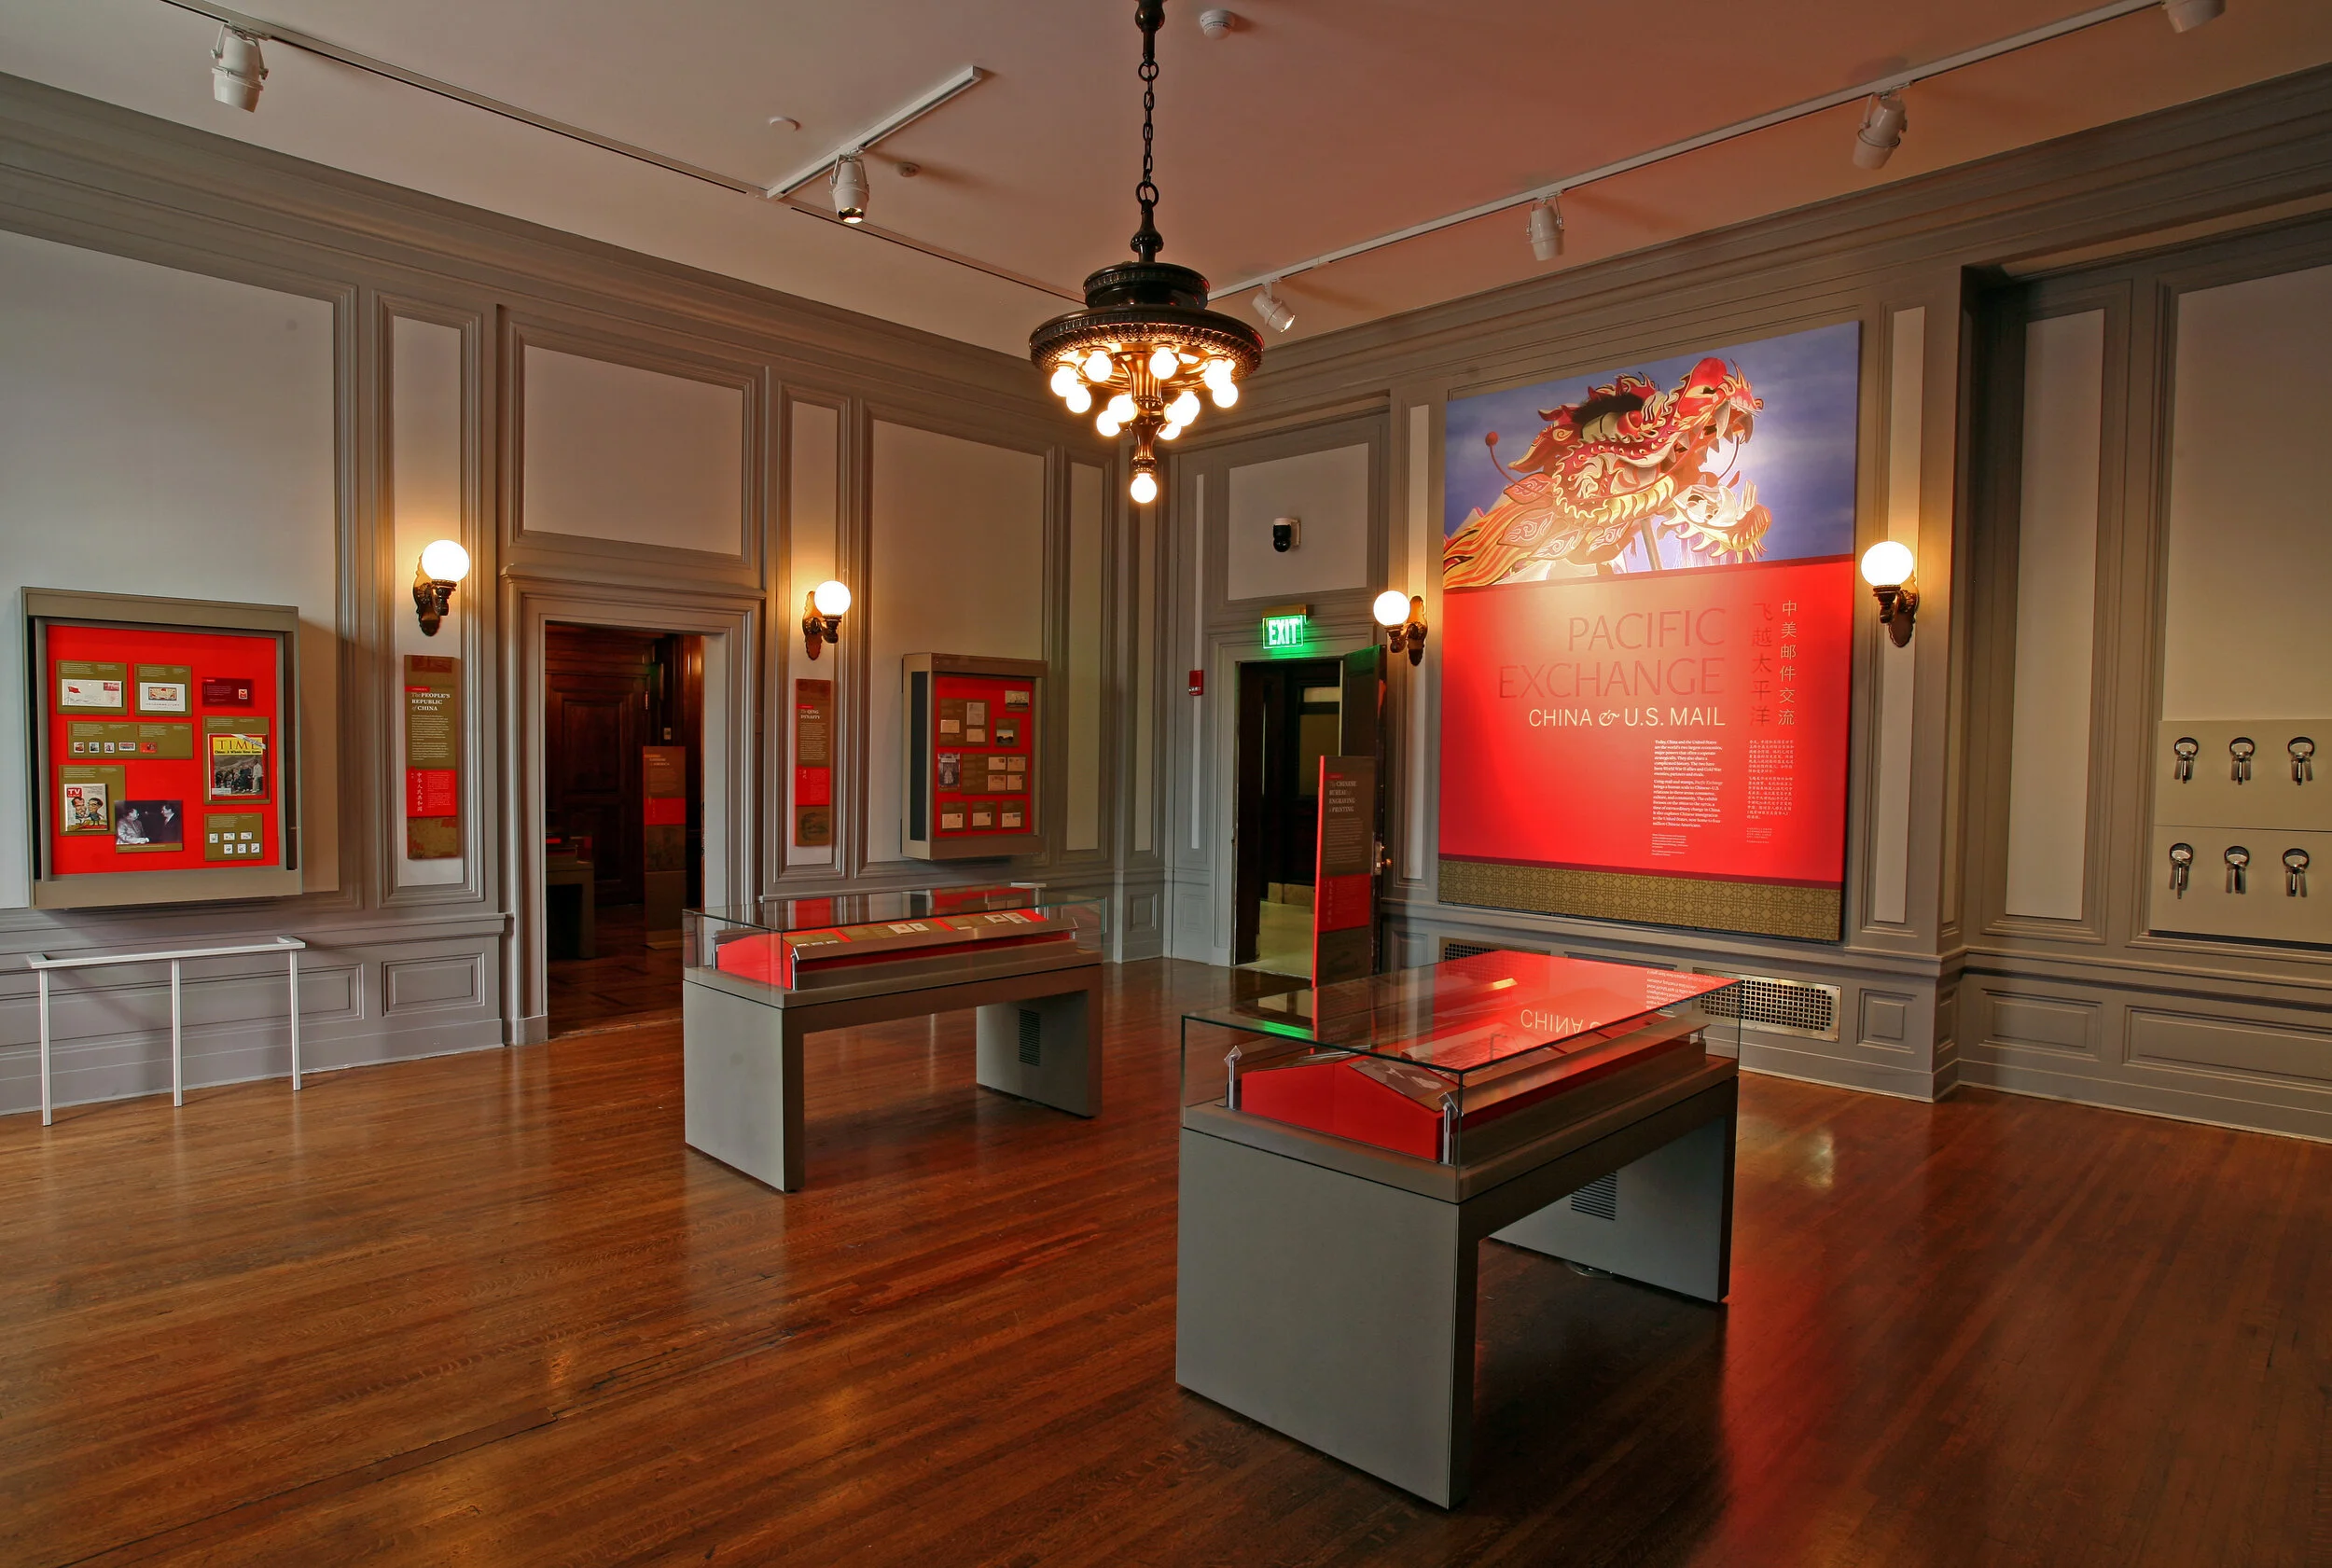
Pacific Exchange: China & U.S. Mail is the second exhibit to be on view in the Postmasters Suite gallery at the Smithsonian National Postal Museum. From the exhibit website: Using mail and stamps, Pacific Exchange brings a human scale to Chinese–U.S. relations in three areas: commerce, culture, and community. The exhibit focuses on the 1860s to the 1970s, a time of extraordinary change in China. It also explores Chinese immigration to the United States, now home to four million Chinese Americans. (Thank you to James O'Donnell of the Smithsonian for the above photo.)

Upfront: I am a bit of a stamp nerd. I have a small collection of Olympics stamps, mostly international, from the 1960s and 1970s. (You have to focus when collecting stamps!) So I really enjoyed working on an exhibit about philately.

This was my swan song at Gallagher & Associates. I handled the design myself, from designing the exhibit’s visual concept to laying out production files for all of the graphics. I also designed the exhibit plan and artifact case layouts. Even though this is a small exhibit space, it had more than 100 artifacts, so making [nearly] everything fit comfortably was a bit of a challenge!

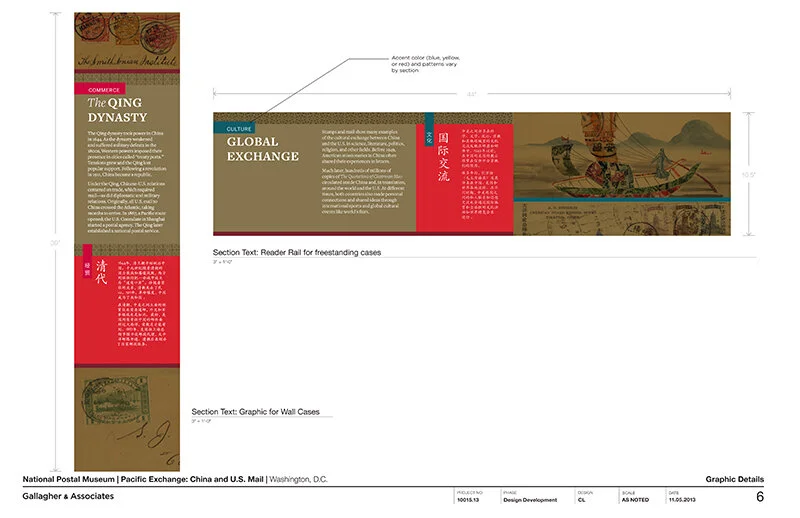
The design drawing above is an example of how a case layout looked during design development, and below are those same cases, made real:

PacificExchange_commerce-cases2.jpg

Graphics were digital output mounted on sign blank, trimmed to edges, with a matte overlaminate. The wall-mounted and freestanding graphics were backed with 1/2" MDF painted Benjamin Moore “Bonfire” to match the primary exhibit red (Pantone 1795). The freestanding graphics had duplicate panels on either side of the mdf — a panel sandwich which was held in place by adjustable metal sign bases. The Smithsonian Office of Exhibits Central printed and built the graphic components. Blair Fabrication built the case furniture.

PacificExchange_culture-case2.jpg

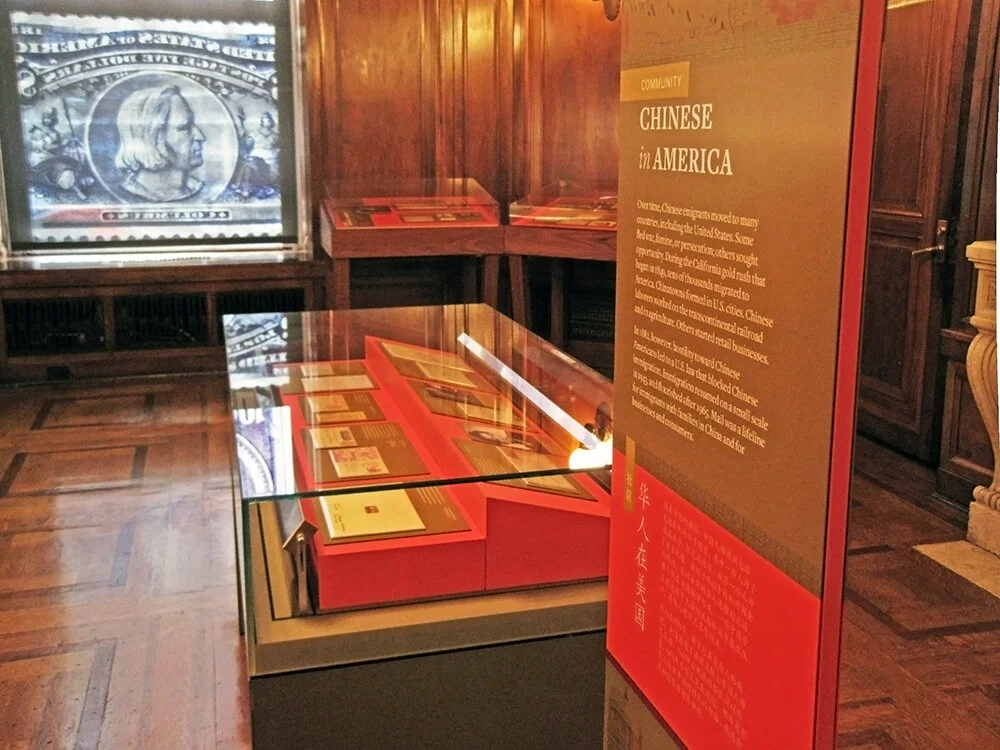
Most of the exhibit text is in English and Chinese, a design challenge I enjoyed. In the artifact case below, some of the artifacts were loans that had to be displayed flat. The other half of the plinth has a 15° rise to create a comfortable reading angle.

I arrived at the color palette after some research into significant colors in Chinese culture. I used red and gold as the dominant exhibit colors, with a deeper maroon red for accent. I used a third red, one with pink undertones — red, is the color of prosperity and good fortune, among other meanings — for the Commerce section of the exhibit; yellow, the color of heroism, for the Community section; and blue-green (or qing), to give a feeling of Chinese history and tradition, for the Culture section. I also drew distinctive vector patterns for each section.

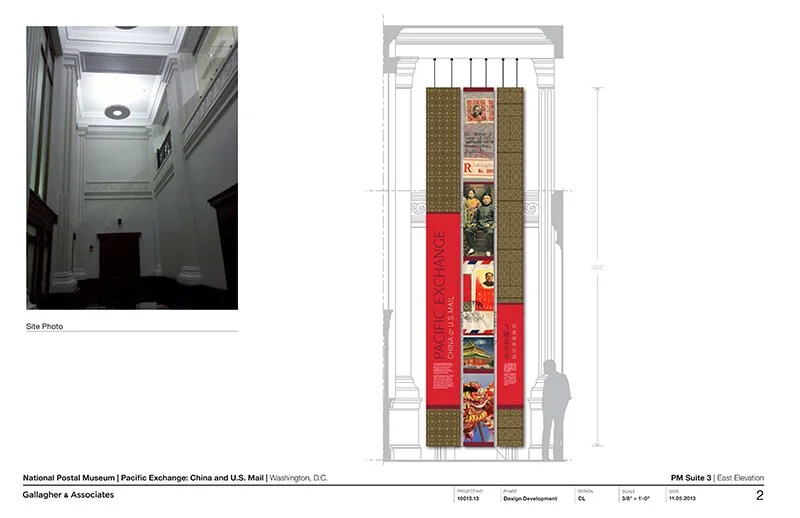
The element that most people extol is the group of banners in the entrance. There are three individual banners and they’re more than 20 feet tall! EPI Colorspace printed and installed them. (Install photos here.) They were printed on “Brilliant Banner” 12 mil. polyester banner fabric. The fabric has a very subtle canvas texture that wasn’t what I originally intended — I wanted a silken look for the banners — but the color saturation and printing quality was so good that I went with EPI’s recommendation.

PacificExchange_entrance-timeline.jpg

I also designed a few of the related print graphics: the exhibit catalogue, a postcard, and the invitation to the opening reception.

The exhibit has been well-received overall and I’m thrilled with how everything turned out. If you’re in DC between now and January 4, 2015, please check it out!

Post updated in January 2021 with minor text edits and additional photos. Broken links have been fixed. This post was originally published at theexhibitdesigner.com on 26 April 2014.

Pacific Exchange install

Work shown was completed while I was a designer at Gallagher & Associates.

I stopped by the Smithsonian National Postal Museum to check in on the installation of Pacific Exchange. I’m excited for the exhibit — my last project Gallagher & Associates — to open next week, on March 6.

While I was onsite, EPI Colorspace was there installing the large-format graphics. I’m very satisfied with the quality. Above, one of the EPI crew installs the hanging hardware for the set of three banners that introduce the exhibit. To the right is a fourth banner with the exhibit title.

After the banners were unfurled they were checked and checked again to ensure that they hung plumb. (Success!) The major graphics for this exhibit were in both English and simplified Chinese. Below: The windows to the right of the banners belong to the educational loft; we had some spectators!

Below: A detail of the weight and stitching at the banner’s bottom.

Above: Within the exhibit’s main room there is another dramatic introductory moment, this time produced in fabric stretched over a wooden frame and hung with heavy-duty D rings. There were happily no problems with measurements and everything went up easy peasy — I had my fingers crossed because there are odd cabinets with door knobs and molding behind the graphic. The EPI crew said I must be lucky.

Below: Graphics wait to be installed within the window openings between the gallery and the lobby.

Above: Work zone!—and three of the completed artifact cases. Below: Installed artifacts. More photos to come when everything is complete!

Post updated in January 2021 with minor text edits. Broken links have been fixed. This post was originally published at theexhibitdesigner.com on 27 February 2014.

Fun projects for the National Postal Museum

Work shown was completed while I was a designer at Gallagher & Associates.

I spent the end of summer through early fall wrapping up construction administration work for the newly opened Stamp Gallery at the Smithsonian National Postal Museum. (Designed by Gallagher & Associates.)

I inherited the project from a departing colleague and had very little to do with the design of the exhibit, but I did design the museum’s gallery guide, a fun little project.

I have also been working on a temporary exhibit for the Postal Museum called Pacific Exchange, about China–U.S. relations “through the lens” of stamps and mail. The opening is set for March and I am excited. I’ve really enjoyed the content and being able to give a good amount of attention to a small exhibit. Here’s a sneak peak of the design development:

Post updated in January 2021 with minor text edits. Broken links have been fixed. This post was originally published at theexhibitdesigner.com on 19 November 2013.

FDR Museum, part 4: rear-lit and neon

Work shown was completed while I was a designer at Gallagher & Associates.

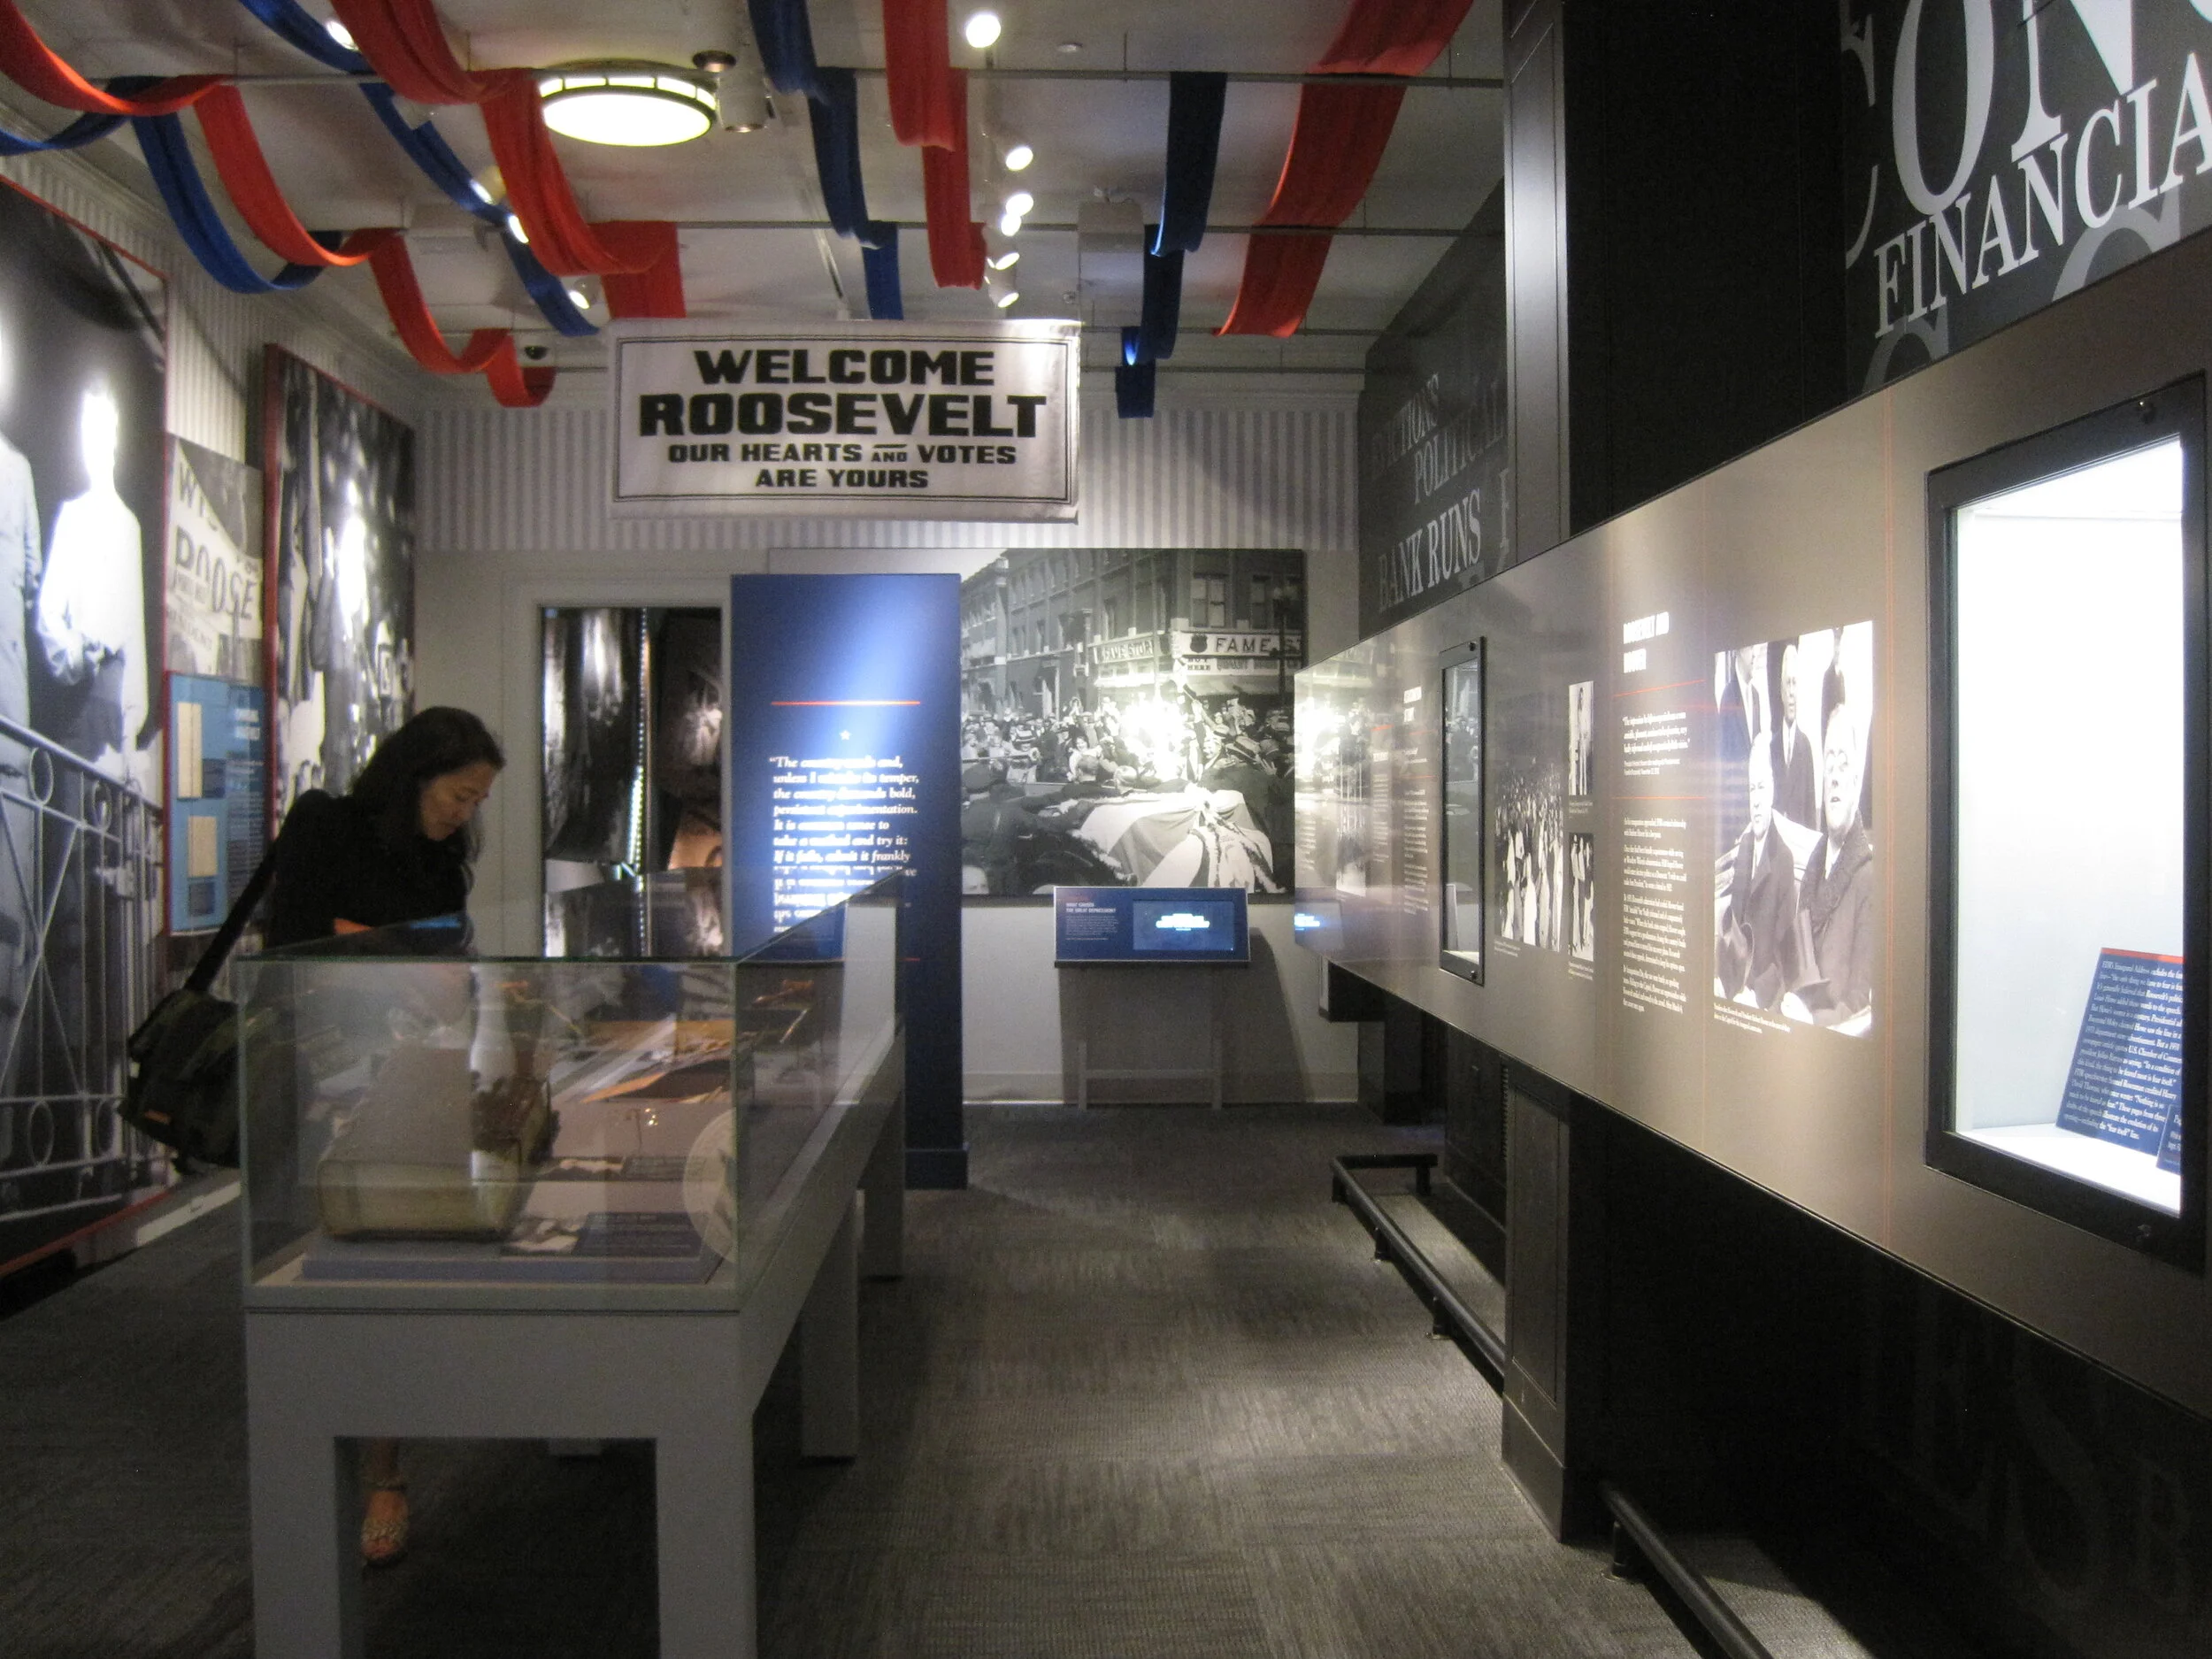
To wrap up my series on the design, fabrication, and installation of the Franklin D. Roosevelt Museum, a close look at the first exhibition gallery.

The first gallery sets the stage for FDR’s presidency: the Great Depression. The focal point here is the neon-illuminated “FEAR” wall. Text is silkscreened onto the glass panels and rear-illuminated with LED pads. The red color comes from the custom “UMEMPLOYED” neon letters; the mural image in the back is a black and white photographic print.

The FEAR letters are applied to the rear of the glass. I wanted them to be translucent — to allow the mural image to show through and create depth — and also be as richly black as possible. The fabricators, Explus, provided a variety of production samples to try to achieve the effect I was after. Printing the letters on a transparent film and applying it to the glass, in particular, was unacceptable as I wanted a uniform transparency (no streaks, no dots).

Explus created a self-adhering vinyl by applying Sentinel OptiClear Adhesive to the face of the gel sheet (Rosco Cinegel Neutral Density N.9 Gel Extra Wide) and die-cutting it. I was happy, but the fabricators had some difficulty with cutting and applying the gel sheets. Their graphics manager told me that if they were to do something like this again they would use a standard window tint that has the application adhesive already on it. Here’s the sample:

Turning to the wall opposite:

The background mural is printed on DreamScape, as I mentioned in a previous post. Most of the murals in this museum were applied to backers, framed, and cleat-hung to the wall, but this particular one was applied directly to the wall and its edges captured with flat aluminum strips.

The framed graphics are digital prints with an overlaminate, mounted to sign blank. They were applied onsite to an MDF backer panel and aluminum frame. (The backer and frame are screwed to the exhibit wall; the graphic is applied with VHB tape.) Explus welded the frames’ corners before painting them, and that made a huge difference in the appearance of them. They are nicely finished and high-quality.

Post updated in January 2021 with minor text edits. Broken links have been fixed. This post was originally published at theexhibitdesigner.com on 25 June 2013.

FDR Museum, part 3: almost done!

Work shown was completed while I was a designer at Gallagher & Associates.

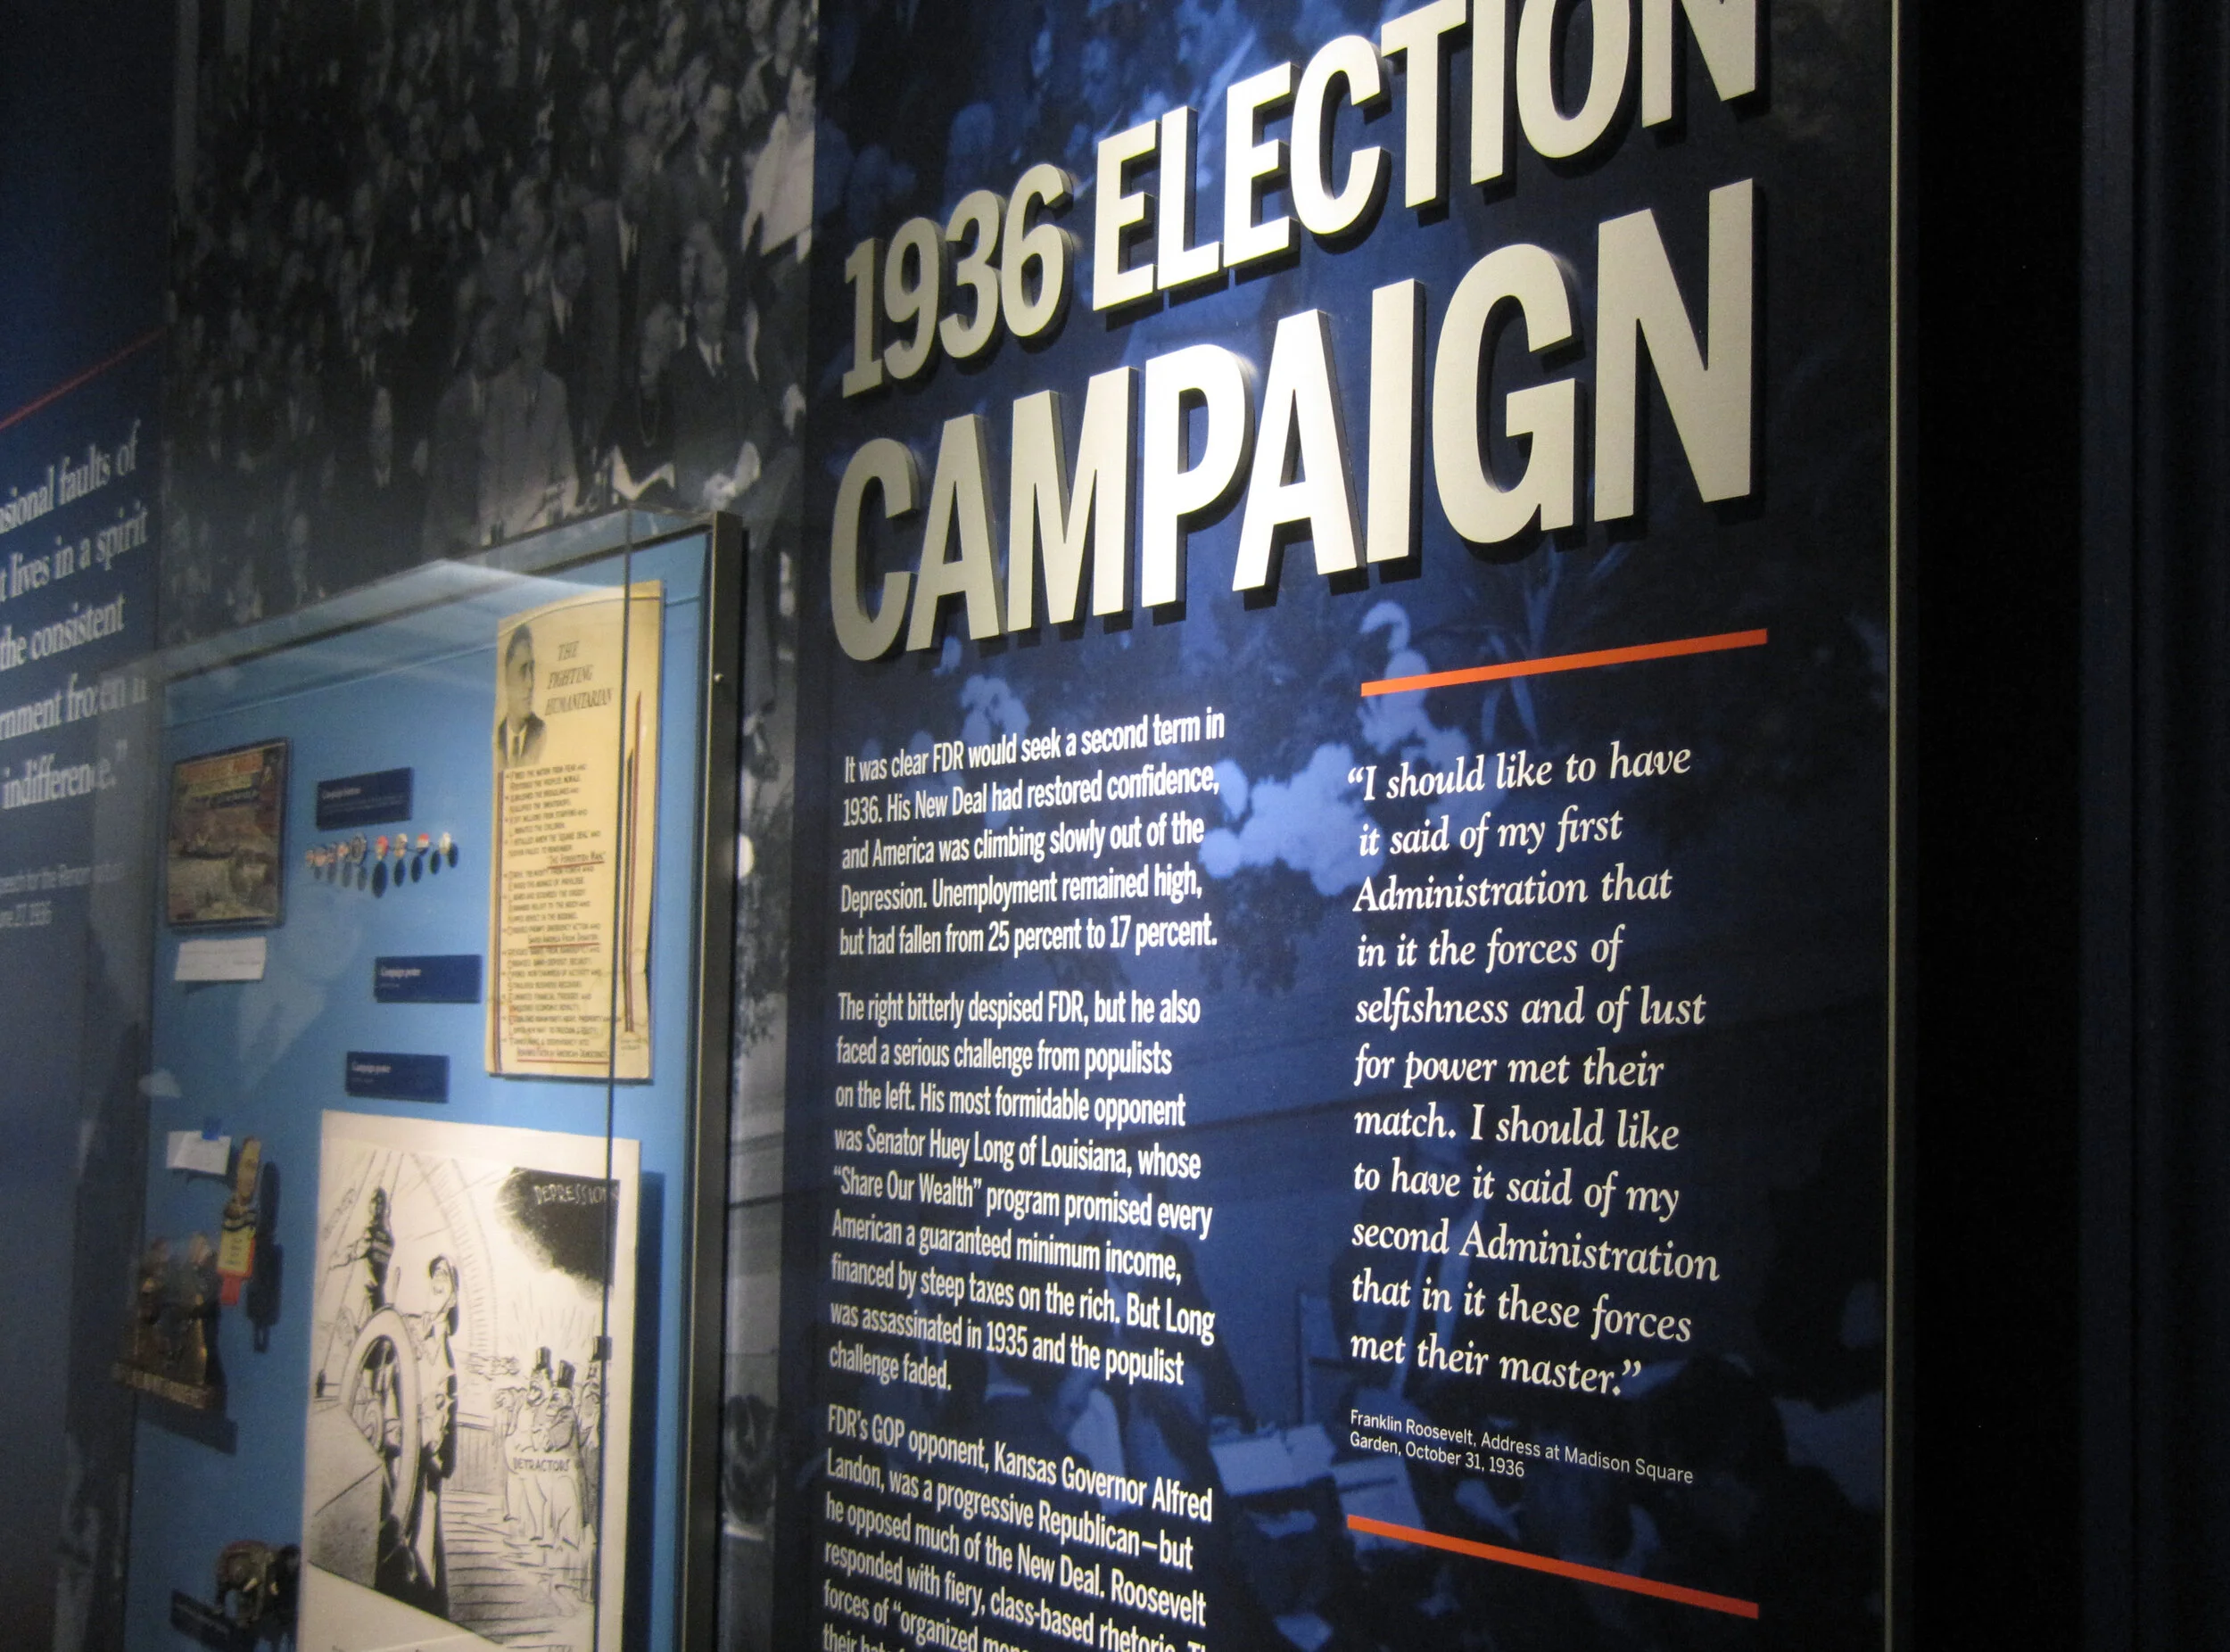
I am back in Hyde Park — installation continues! The exhibits are quickly coming together as the opening nears. Most of the graphics are hung, dimensional letters have been pinned (there are a ton throughout the museum — I went dimensional-letter-happy), and the interactives are being field-tested. I think it all is looking great. Some photos of the A New Deal gallery:

IMG_8087.JPG
IMG_7985.JPG
IMG_7806.JPG
IMG_8131.JPG

Artifact cases are being filled:

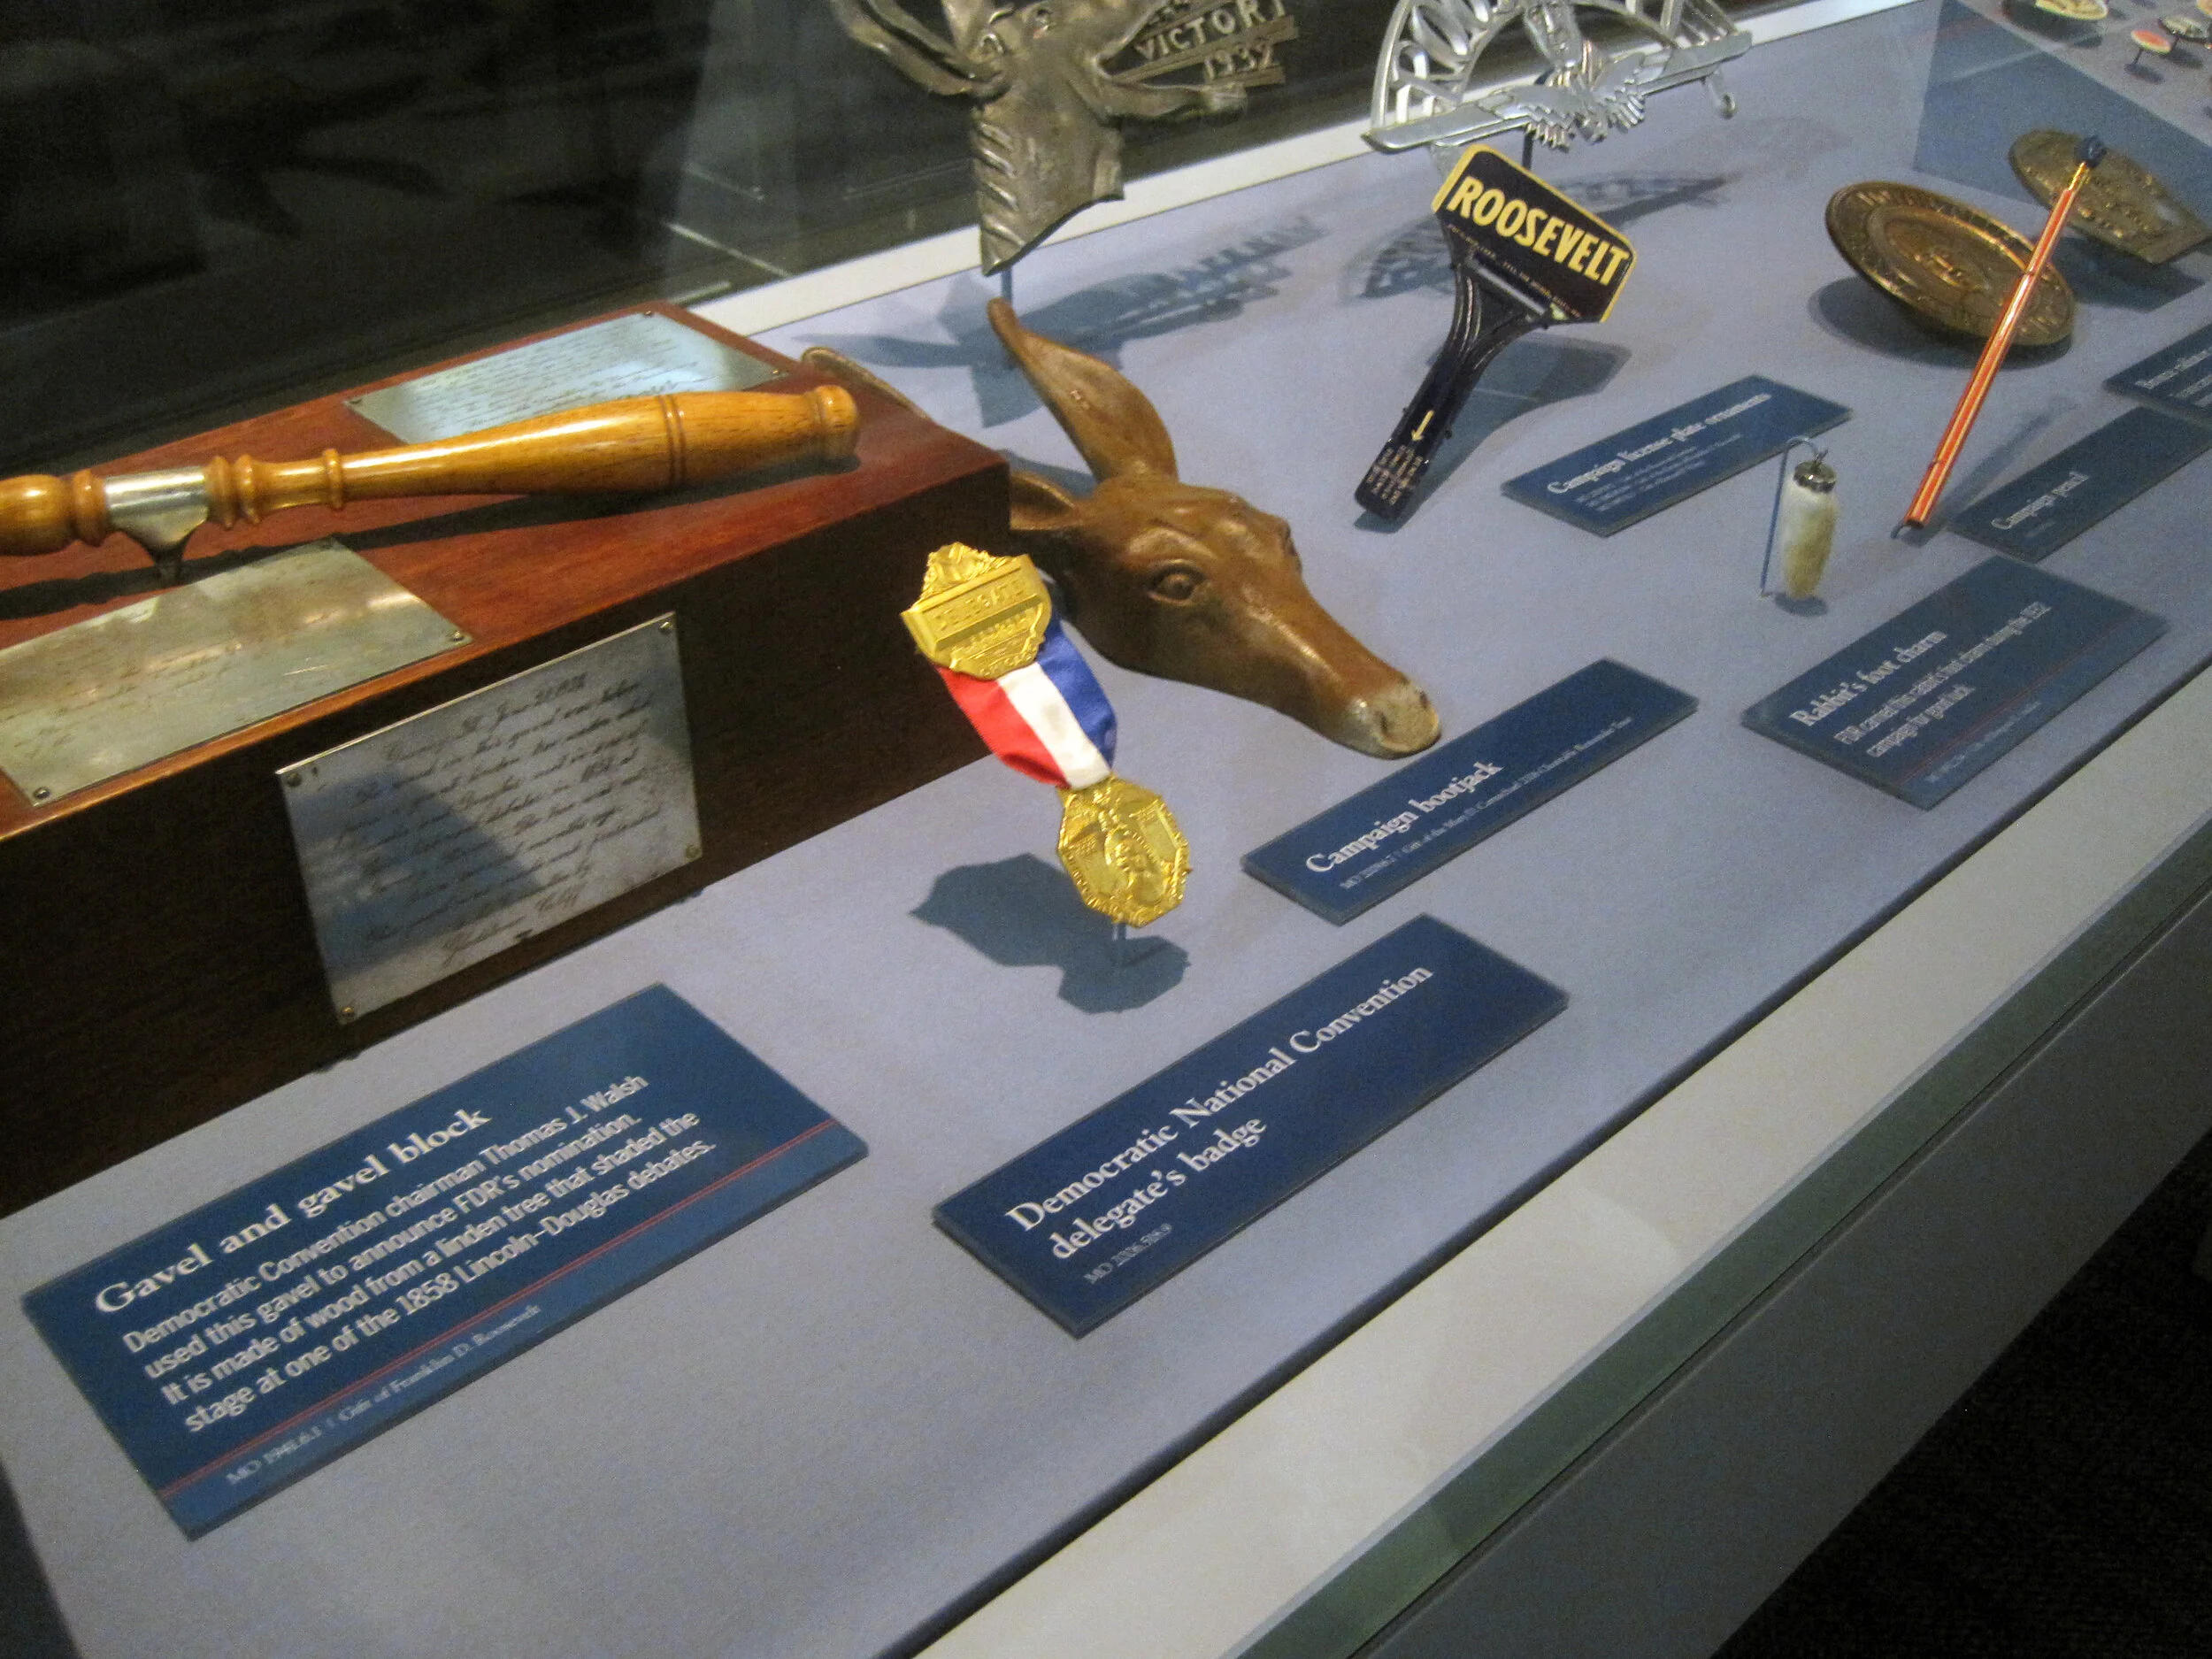
It’s a papier-mâché FDR sphinx!

IMG_8146.JPG

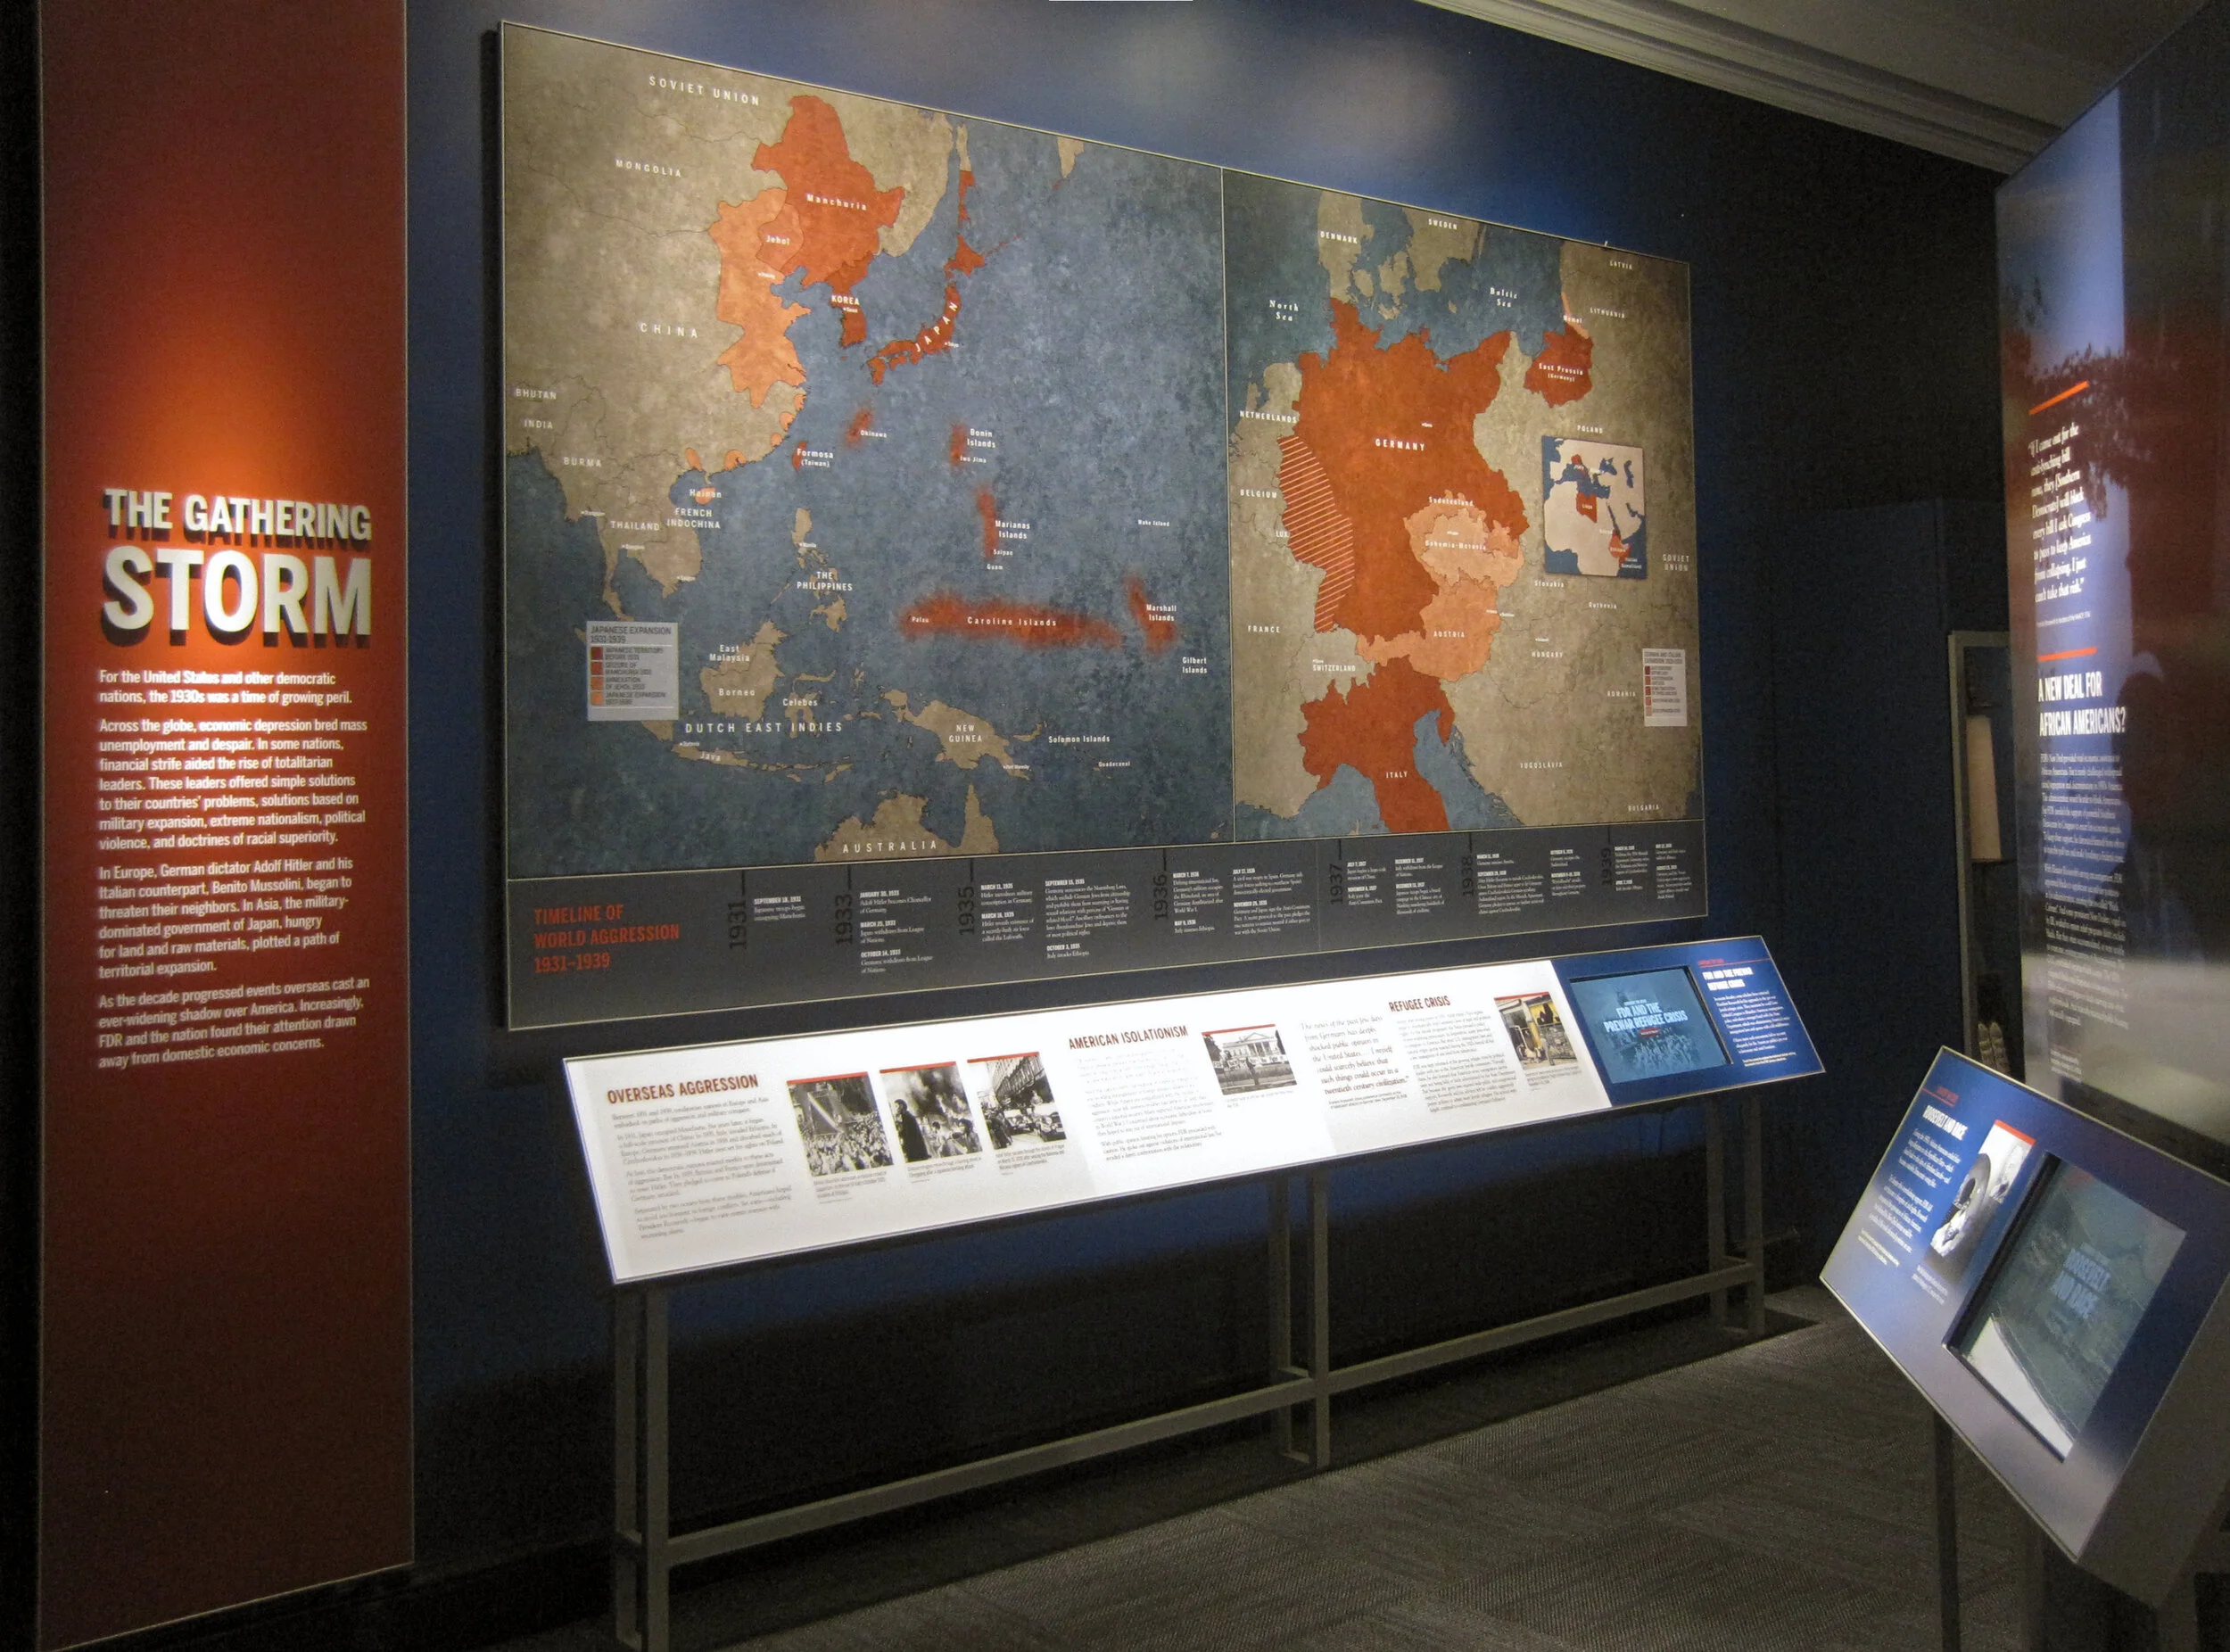
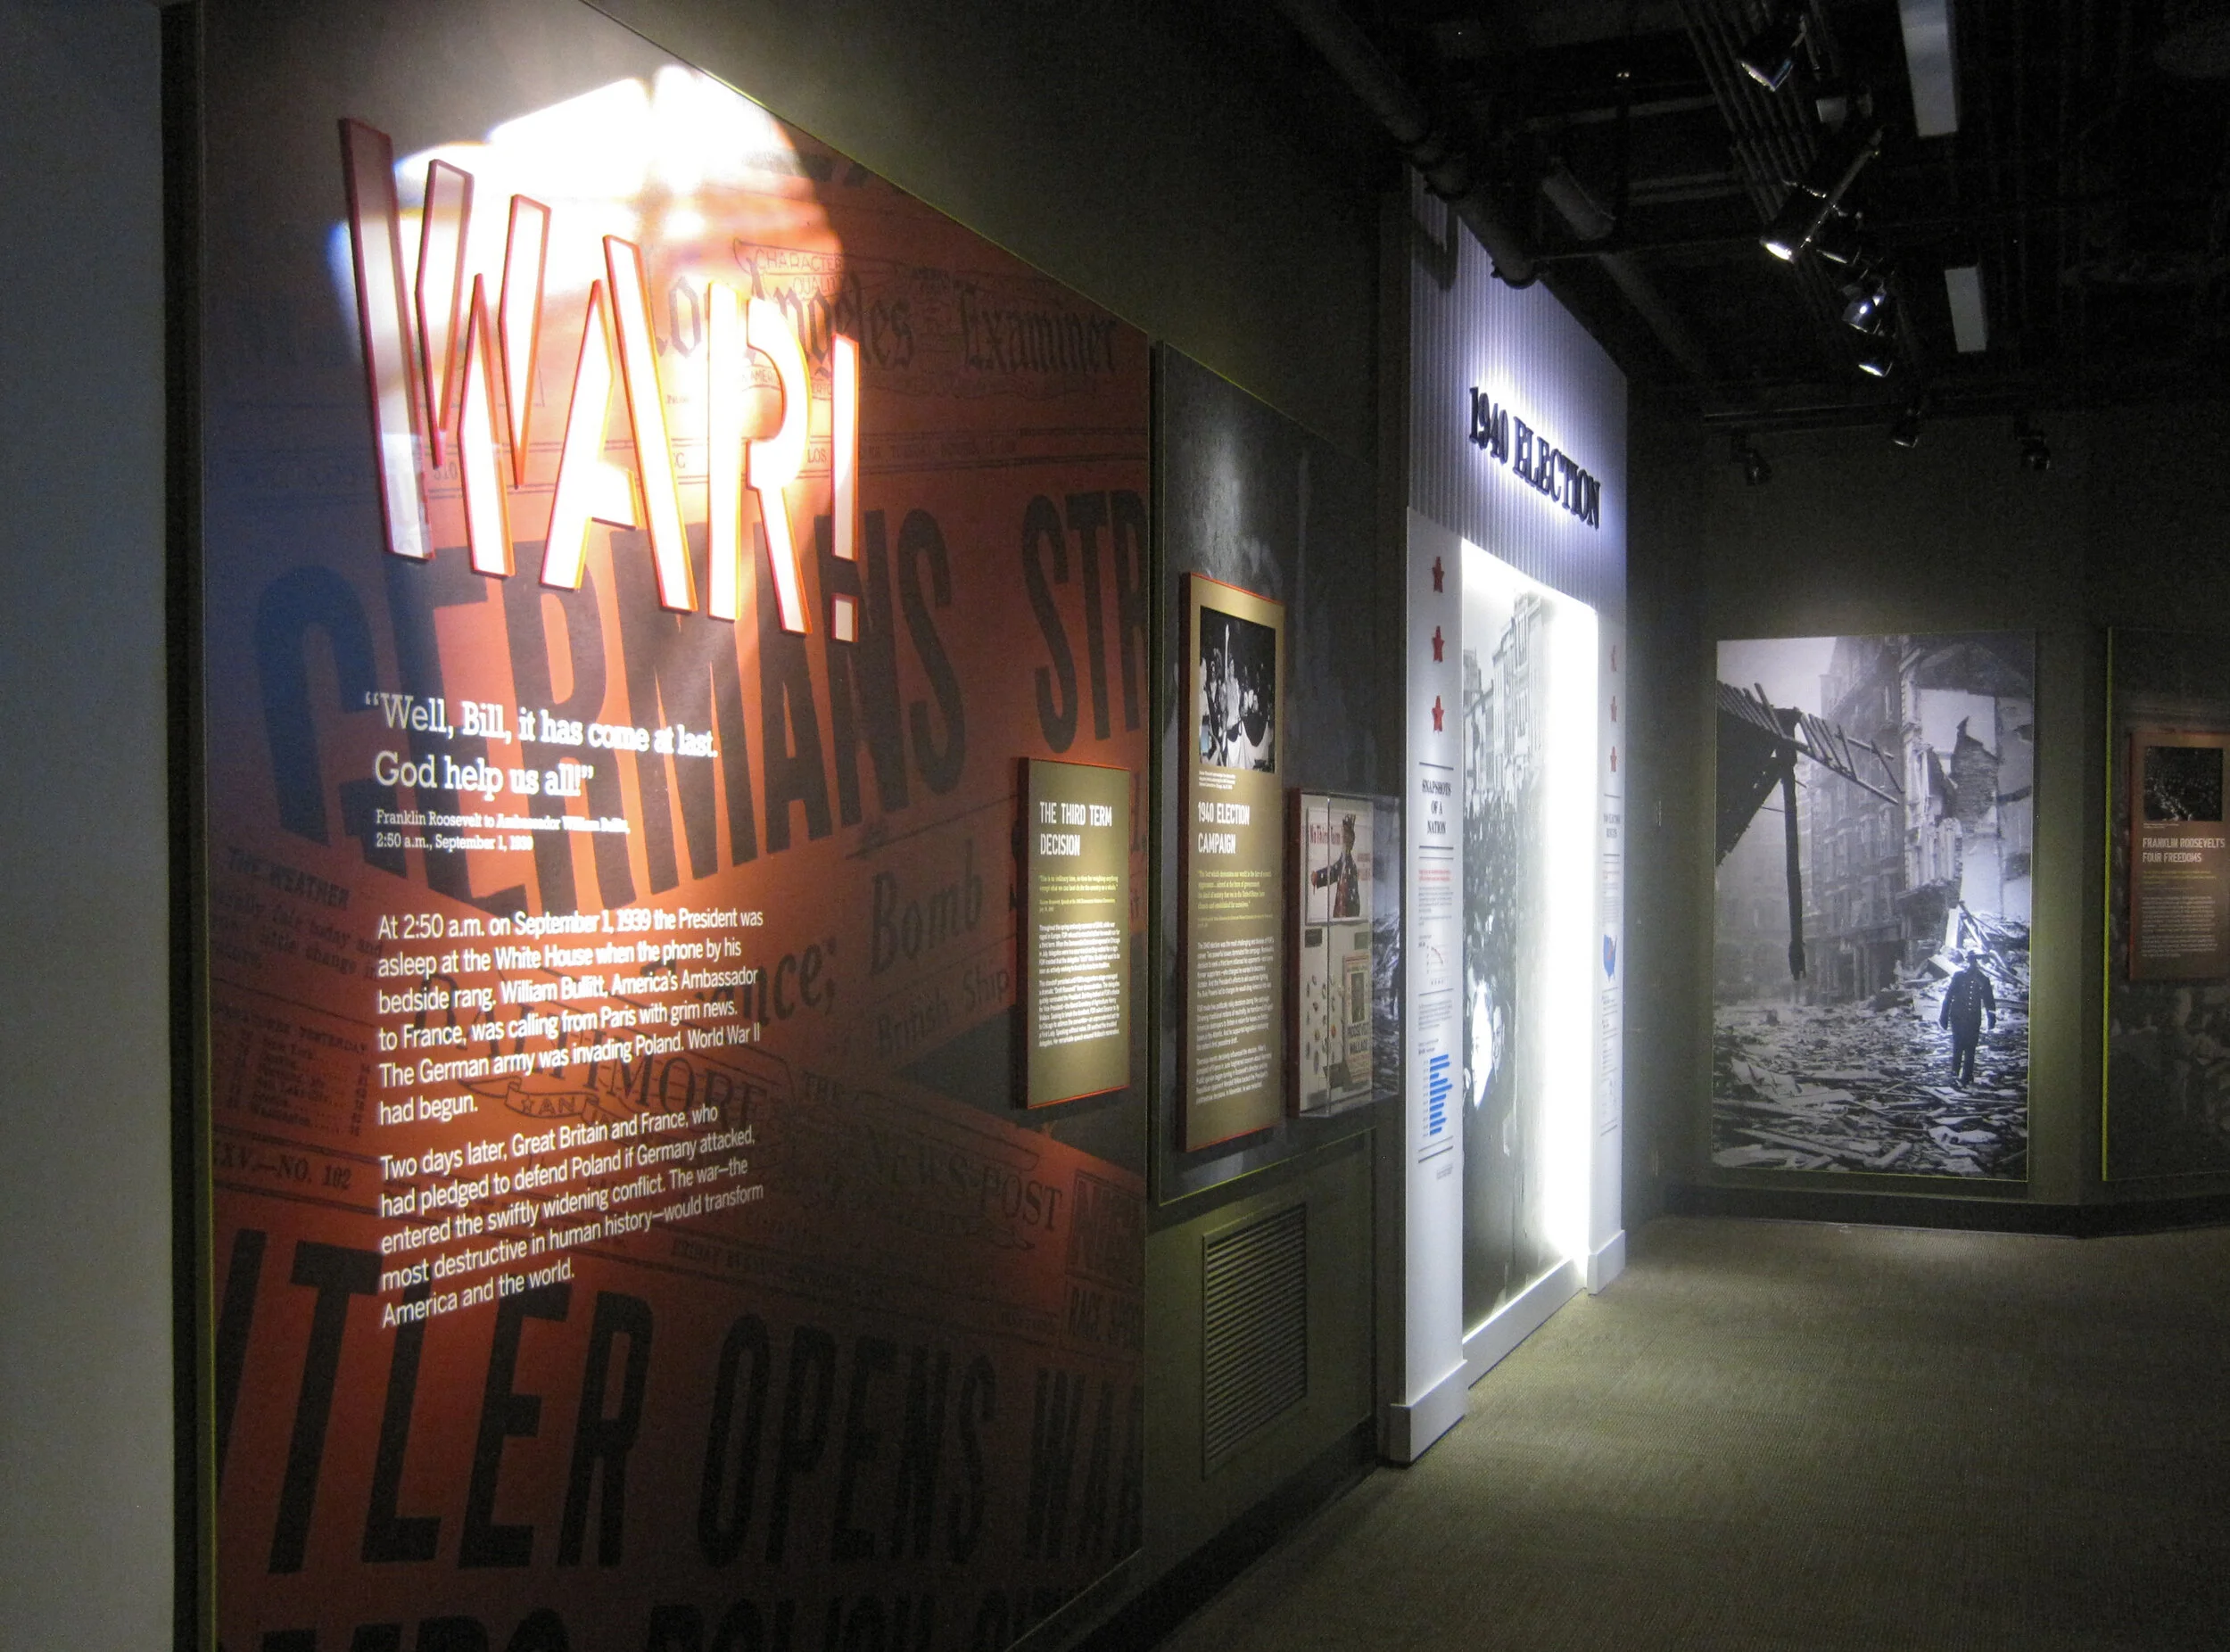
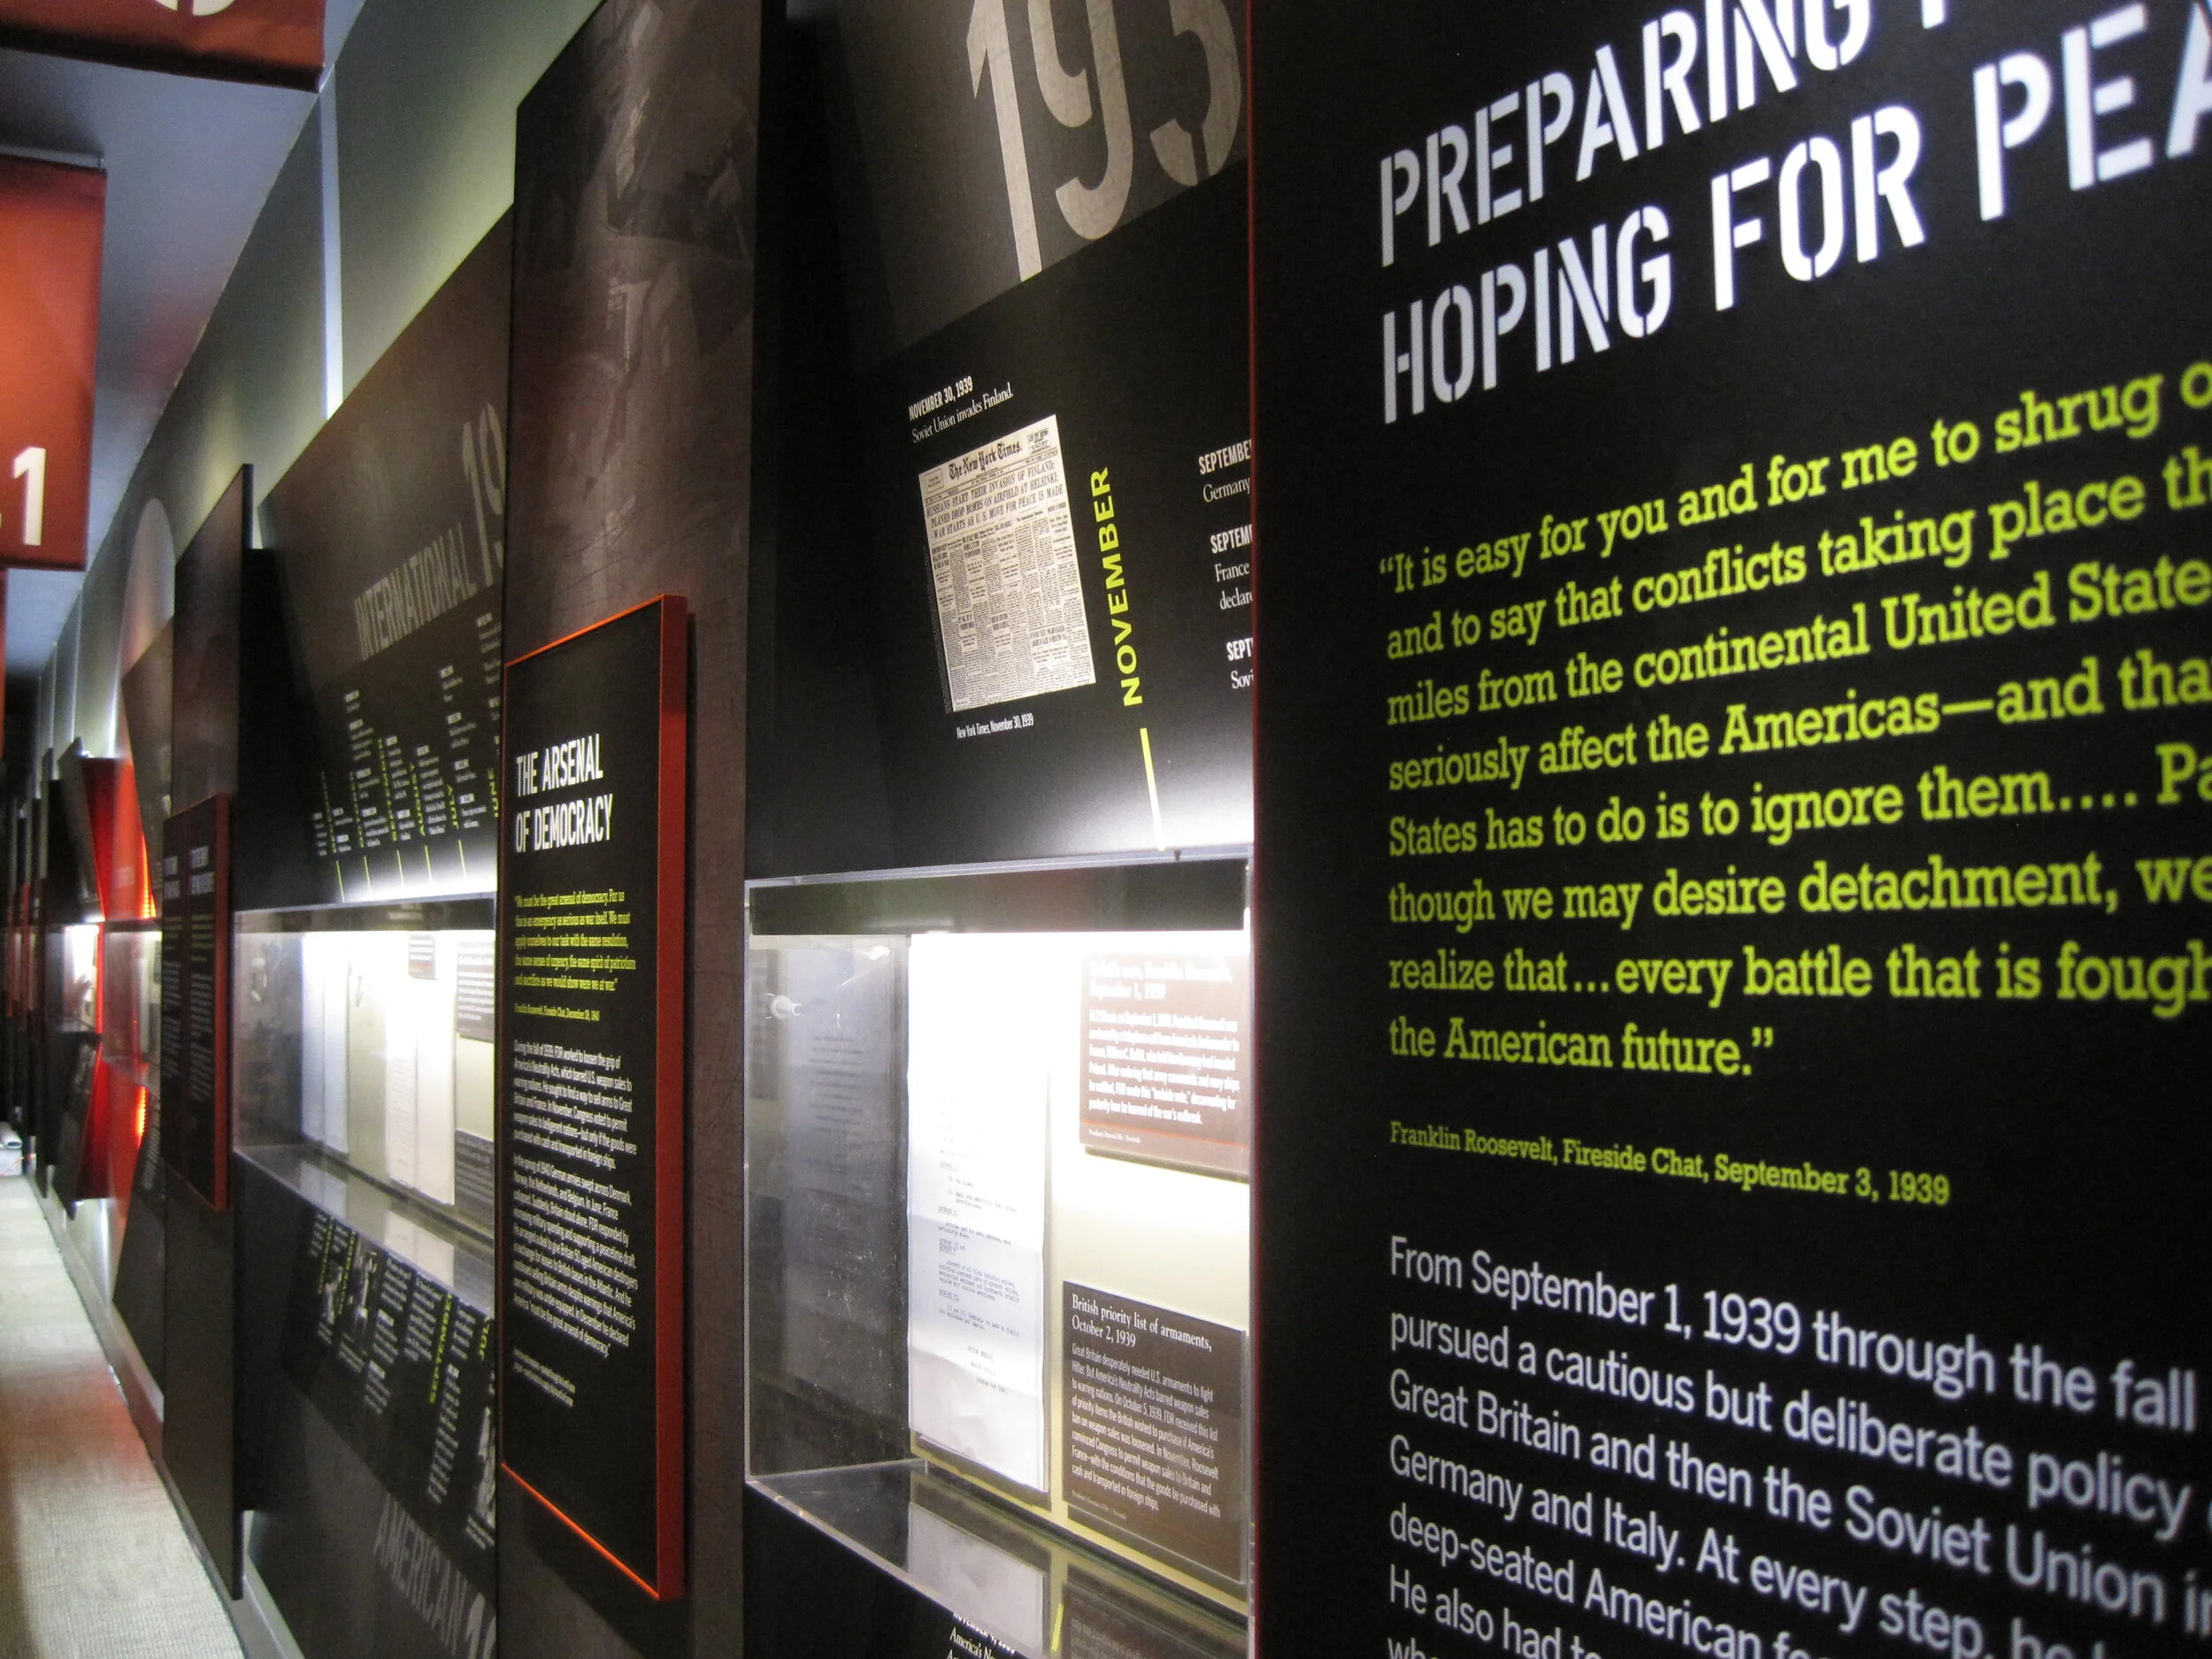
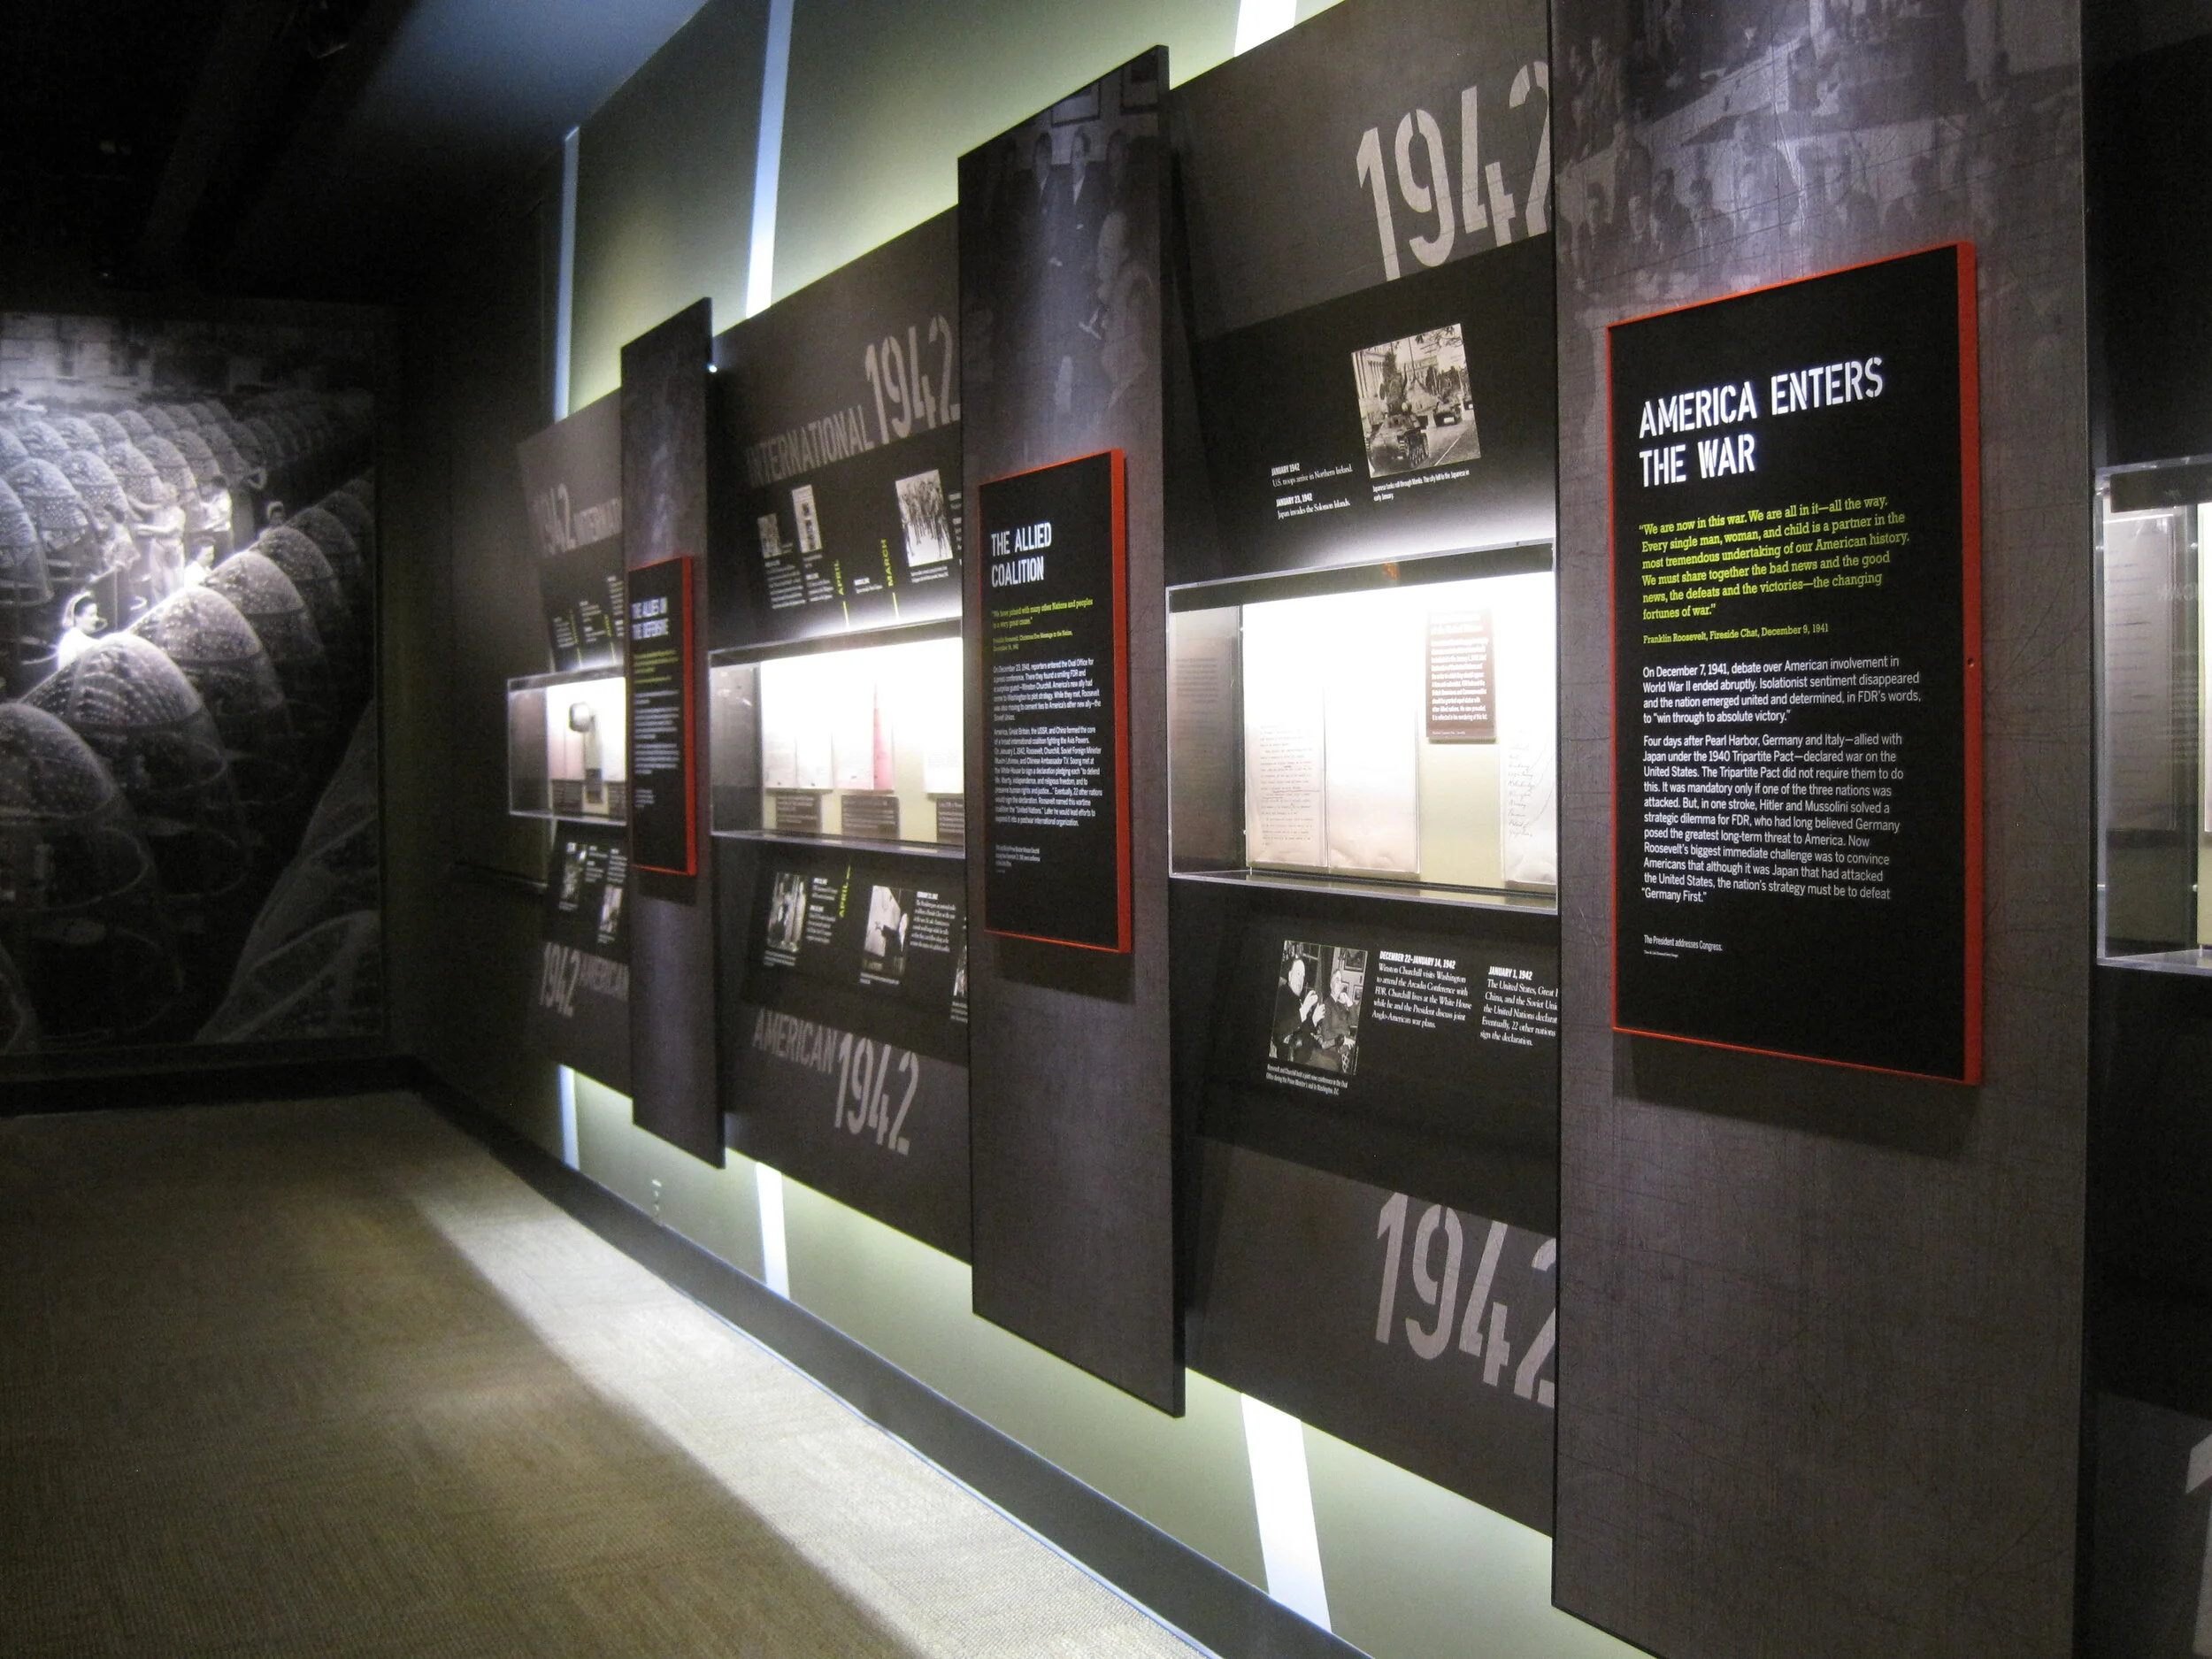
The World War II timeline is nearly complete (two weeks ago there wasn’t much hung besides the skeleton). What a bear that was to design!

IMG_7941.JPG
IMG_8168.JPG

I may have snuck into some New York Times photos while I was onsite. The critic and photographer were there, I was there ... who’s to say. We’ll see.

Post updated in January 2021 with minor text edits and additional photos. This post was originally published at theexhibitdesigner.com on 24 June 2013.

FDR Museum, part 2: installation continues

Work shown was completed while I was a designer at Gallagher & Associates.

I was back onsite with the Gallagher team at the FDR Library this past week and took more photos of the exhibit installation. It’s exciting to see the various elements go up. The exhibits are dense and layered; it’s a big story to tell in a relatively small space. The exhibits are in the original — now renovated — library conceived by Roosevelt himself so we were restricted to the existing spaces while designing the new exhibits.

Most of the graphics still have a protective film layer and ID label on them. In other places there are backers awaiting graphics, brown paper-wrapped graphics sitting on the floor, and assorted construction detritus. But bit-by-bit it’s going up! And we all know that everything happens in the last week before opening anyway. ;)

Updated, to add a photo of the finished gallery, The Promise of Change:

IMG_8042.JPG

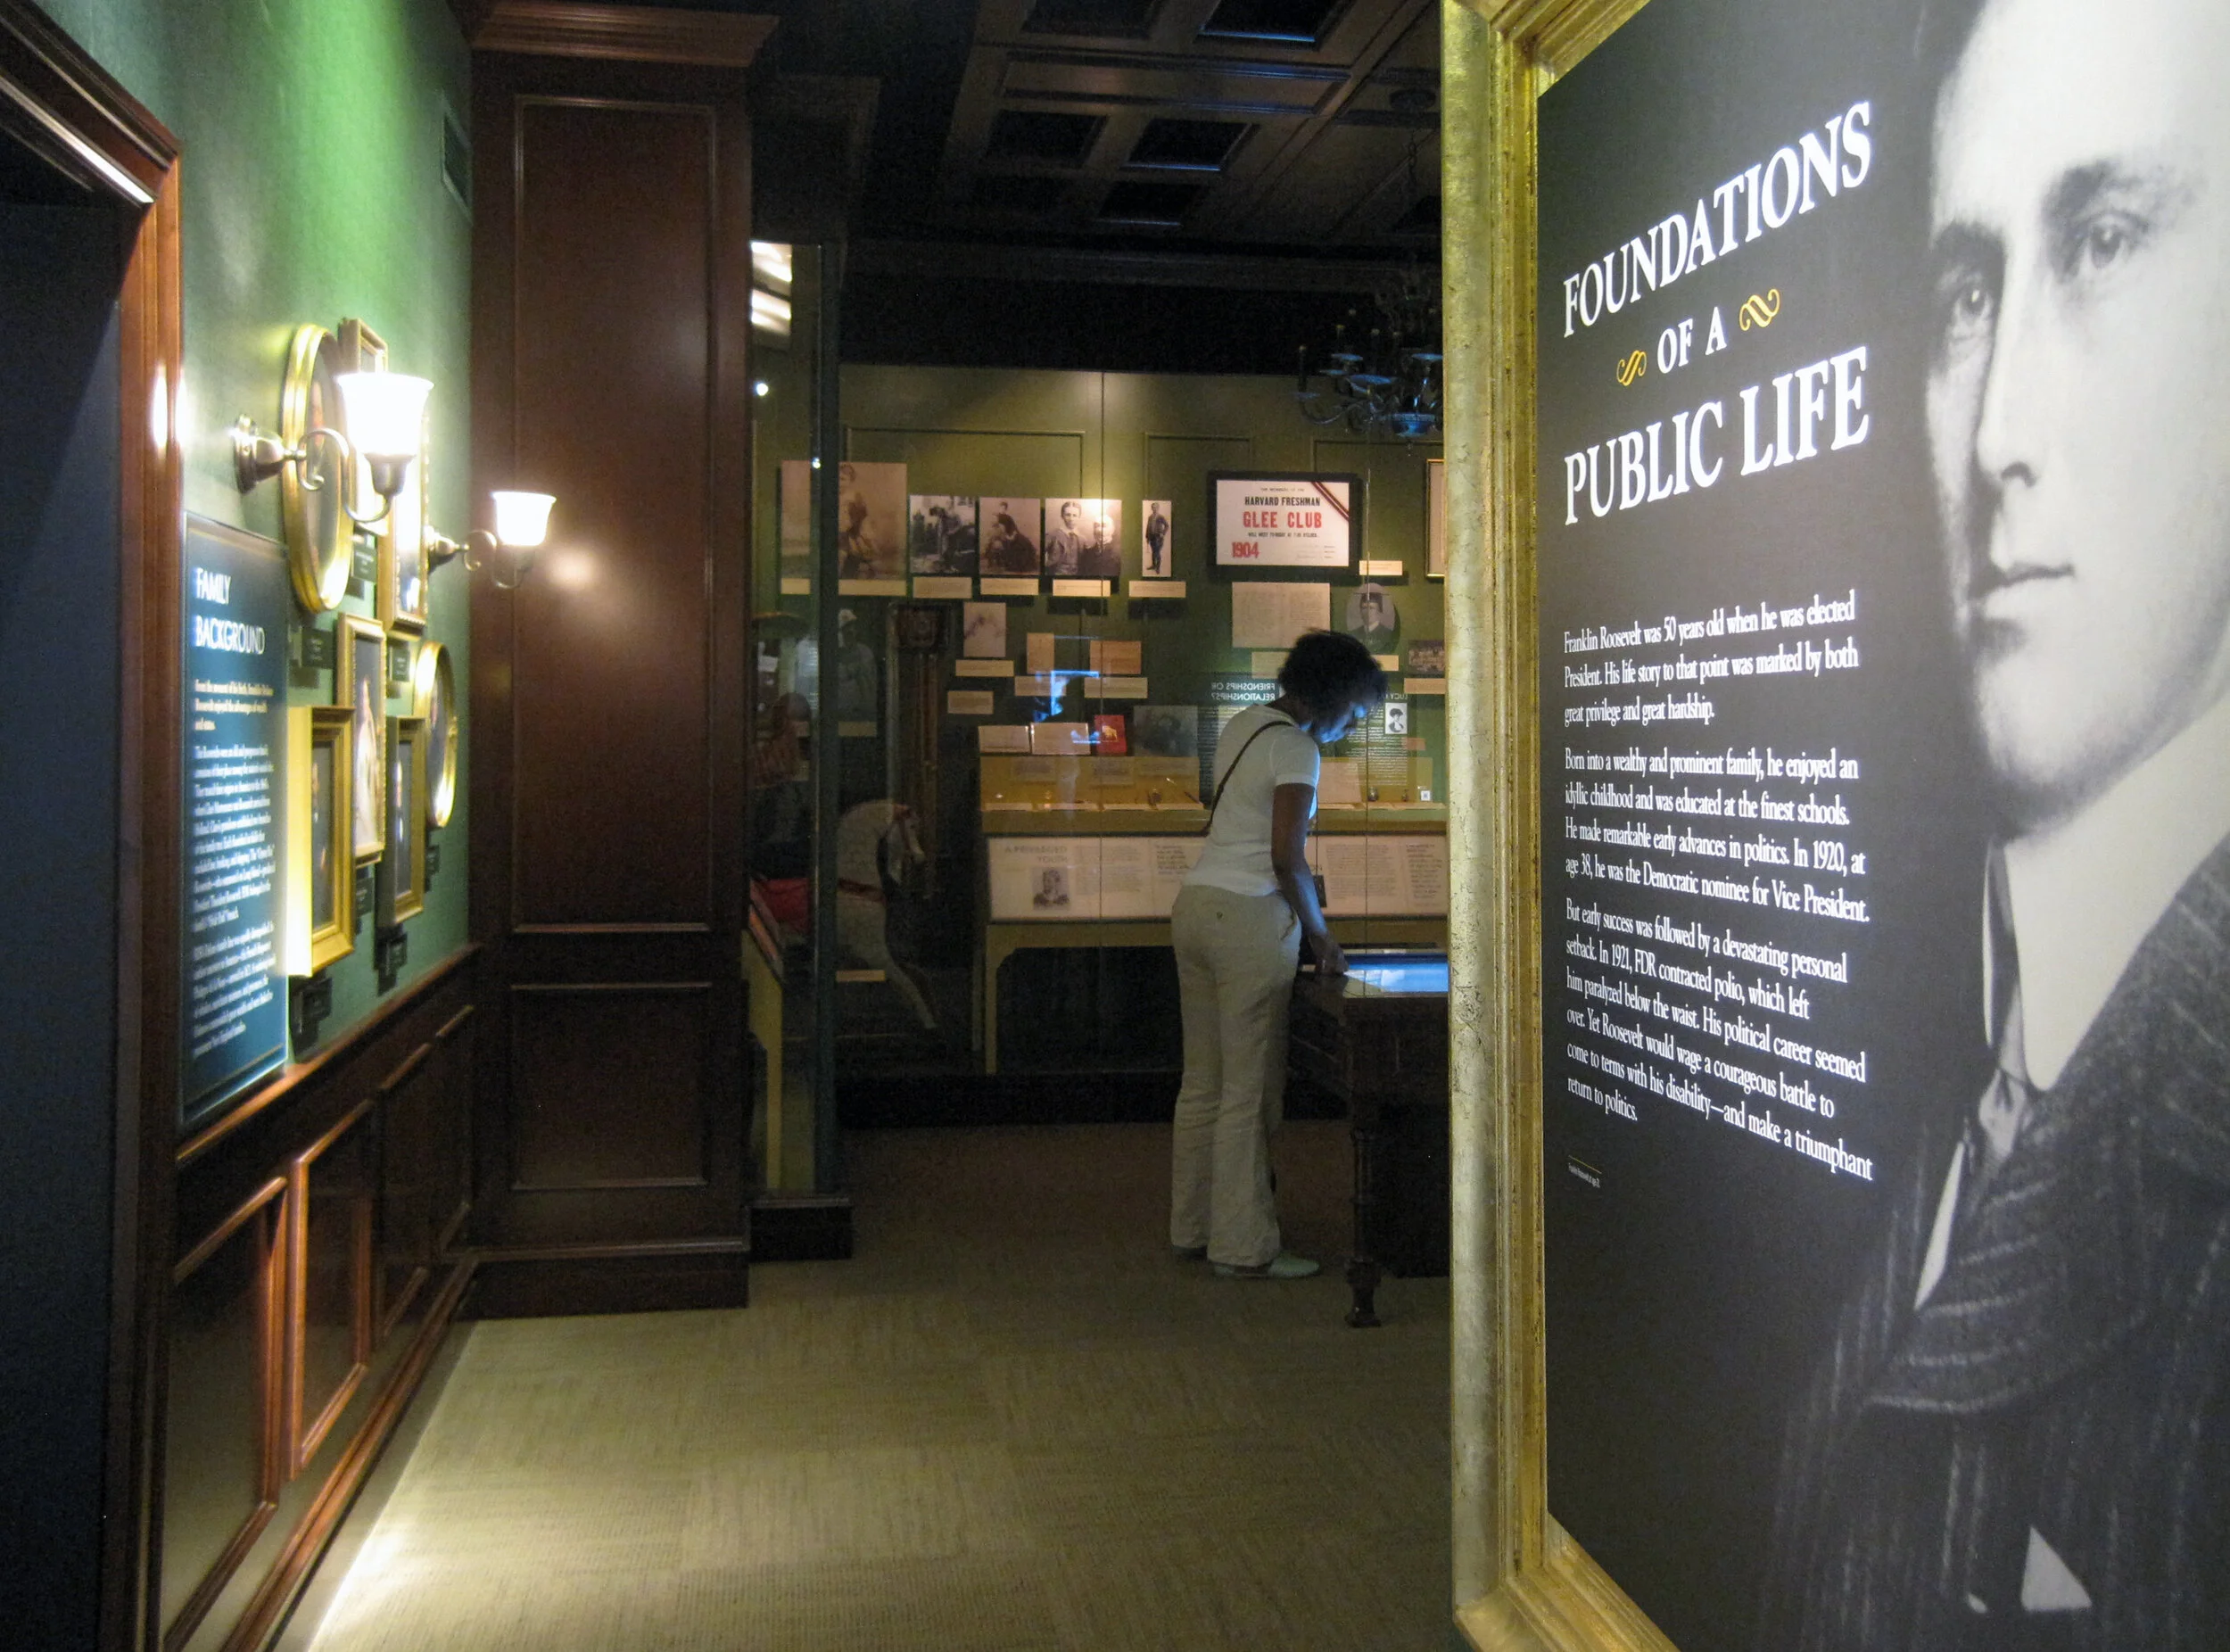
Updated, to add a photo of the finished gallery, Foundations of a Public Life:

IMG_8066.JPG

Below, left: These graphics will be installed into the WWII timeline, on the right side of the photo above. They are printed on Laserchrome, which I mentioned in my previous post — and they look incredible.

I also mentioned the DreamScape wallcovering; below is a shot of some installed murals. I think they look good. Once the text panels, dimensional titles, reader rails, etc. go up — it will look great. More, soon!

Post updated in January 2021 with minor text edits and additional photos. Broken links have been fixed. This post was originally published at theexhibitdesigner.com on 16 June 2013.

FDR Museum, part 1: under construction and opening soon

Work shown was completed while I was a designer at Gallagher & Associates.

For the past couple of years I’ve been working on the Franklin D. Roosevelt Presidential Library and Museum, in Hyde Park, New York and (holy cow) the public opening is less than a month away. With time dwindling, I am finally sharing some process photos: production samples, shop visits, and installation.

The library has been posting photos of the installation on their tumblr. (2021 update: their tumblr is still going strong!) The photo below comes from there; I grabbed it to highlight the graphic in the background. There are four of these structures throughout the museum, one for each of FDR’s elections.

The “election stats” graphics are silkscreened onto Acrylite P-95 with white vinyl film adhered to the second surface. Silkscreening on P-95 creates a subtle shadow, which at certain angles makes the text appear dimensional. (For this reason, it should also be done with caution.) Here’s a photo of the sample provided by Explus, the fabricator (the installed graphic above is waiting for its red dimensional stars to be attached):

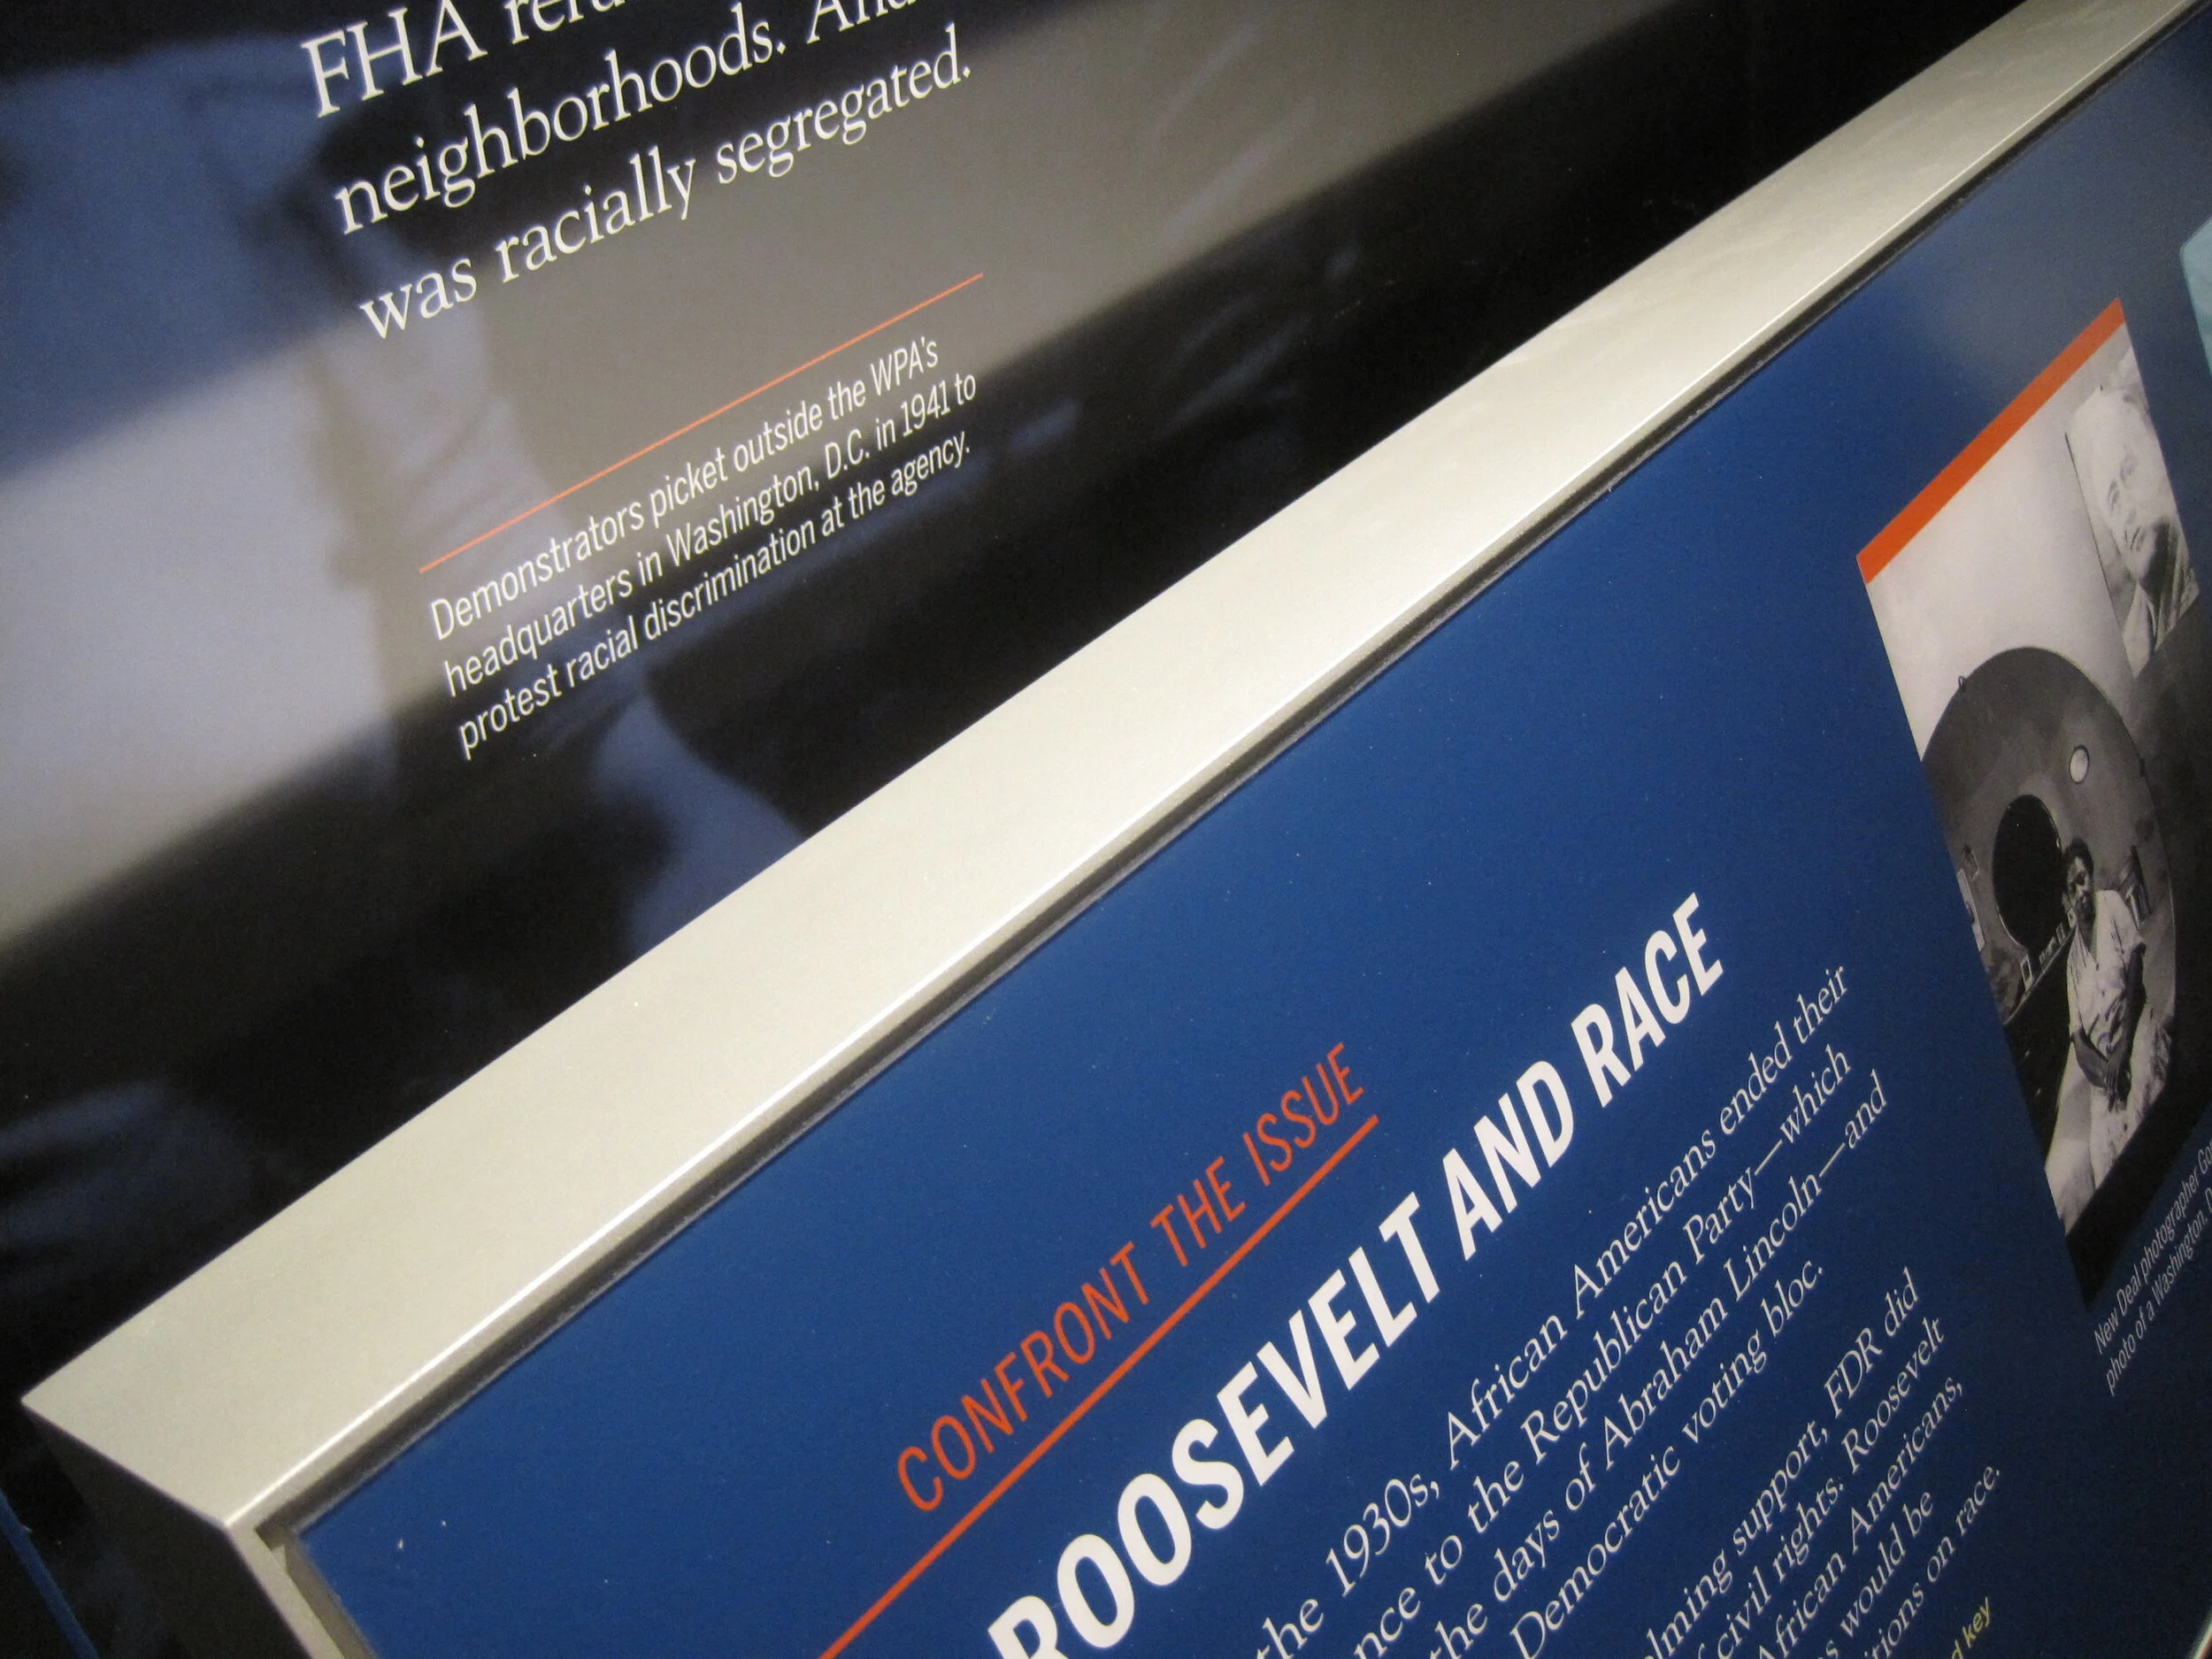
Below, the main story panels, used in the World War II gallery, which I am especially happy with:

They’re built from 5/8" clear acrylic, which has been painted on the front surface with acrylic paint, with a “window” left free of paint. The text is printed onto the painted acrylic surface, and then the photo — a Laserchrome metallic print — is adhered to the second surface of the acrylic, within the window area.

The photo above gives you a sense of the depth and jewel box effect created by layering the photo behind the acrylic. And here’s a peek at the backside of the pane. The aluminum angle frames are painted with Matthews acrylic polyurethane paint:

For wall murals I spec’ed DreamScape wallcoverings in various finishes. Above is another photo from the FDR blog, showing a few installed murals (currently missing their dimensional titles, and the scaffolding structure that will be located in front). I’m pleased with the crisp image quality, especially on the rough textures, such as “Plaster” (below, on the left) and “Mystical” (on the right).

Post updated in January 2021 with minor text edits. Broken links have been fixed. This post was originally published at theexhibitdesigner.com on 3 June 2013.

BoNE Show 2011, the wrap-up

The AIGA BoNE Show — Best of New England [Design] — is a design competition for New England, hosted biennially by AIGA Boston. I was asked to direct the 2011 show, after doing a decent job of designing the exhibit for the 2009 show, and when I said “yes!” without even thinking about it, I found myself responsible for its call-for-entries, judging, meet-the-judges event, awards show, exhibition, website, catalogue ... every little thing involved in putting on a design competition. (It was also the very last thing I did before I left Boston for DC, back in June.)

First I had to create a theme. I worked with George Restrepo to brainstorm a half dozen promising directions. The eventual winner — “Wicked Problems/Wicked Solutions” — was born while myself, George, and a couple other AIGA volunteers on the BoNE committee were discussing the concept of wicked problems and how design is essential to problem solving. Keeping tongue in cheek, I also liked that if people didn’t exactly understand the deeper meaning of the theme, it could also be interpreted as simply “wicked” in the New England sense.

The call-for-entries (above), designed by Kristen Coogan, featured a playful Rube Goldberg-esque problem-solving machine. This visual identity was carried through the rest of the competition and awards show’s graphic pieces, including the website, designed by Justin Hattingh, with technical assistance from Jeremy Perkins.

Below: In keeping everything aligned to the theme, at the meet-the-judges event — held in Boston the evening before judging began — the three judges each gave a presentation related to “wicked problems.”

All event and exhibition photos by Ben Gebo Photography. More event photos, here.

When designing the exhibition, we continued to play with the problem solving theme. Katelyn Mayfield designed a component-based display system: individual displays could be arranged in any configuration to take advantage of our huge gallery space on Boston University’s campus. The displays could then be packed flat and shipped to other venues when the BoNE Show “went on the road” after its run in Boston.

Here is the exhibition, full of guests on the evening of the awards show:

Exhibit displays were located in the front third of the 808 Gallery. Each display was custom-designed for the design project it held and hand-built from corrugated plastic sheets and PVC pipes. Windows and shelves were built by cutting and folding the plastic sheets, by Katelyn and a crack team of volunteers, including BU’s student AIGA group.

WICKED PROBLEMS and WICKED SOLUTIONS were applied to the wall in giant red and cyan vinyl. Winners’ names were laser cut from thick illustration board and the edges of shelves were finished with cyan-colored tape.

Above, left: I commissioned furniture designer Seth Wiseman of ConForm Lab to design and build two sets of benches which could be moved into endless configurations — a human-sized three-dimensional tangram game. The benches were sold during the event auction and the money benefited AIGA Boston. Seth also designed and built the tangram stage, which is in a couple of photos below.

Above, right: For the media-based winning entries, we built a simple kiosk. Joe Morris designed the interface.

Below, left: Dan Watkins (aka Dan the Man Photo) manned the “photo booth.” He also shot all the photography for the show’s catalogue. Below, right: DJs Dan Riti & Kevin James in their sophomore BoNE Show appearance.

Above, left: The silent auction table. We also held a live auction for the big-ticket items. Jason Stevens and Kathleen Byrnes headed the sponsorship drive. Because the point of this entire production was to raise money for AIGA, we tried to get everything for free (or at least on the cheap), and were very thankful for all of our generous sponsors.

And then there was the gorgeous (award-winning, itself) awards show catalogue, designed by George Restrepo and printed and bound by ACME Bookbinding. The embossed covers came in both red and cyan. The keepsake entry ticket was designed by Ira Cummings and printed and foil stamped by EM Letterpress.

And … the awards show! AIGA Boston chapter president Matthew Bacon served as Master of Ceremonies. Trophies were bone-shaped and cast in aluminum (bronzed for the Judges’ Choice winners), with embossed winners’ names. Names were all punched by hand (by Bridget Sandison, who also — along with Juliana Press and Meghann Hickson — took care of receiving and sorting and tracking all the competition entries) using a vintage Dymo label maker. Same way the awards have been made since the BoNE Show’s inception in 1995.

Thank you to Tracy Swyst, AIGA Boston’s VP of operation, who has overseen many many many BoNE Shows, and to the rest of the AIGA Boston board: Heather, Jodi, Colleen, Brandon, Jillfrancis, Diane, Chiranit, Lee, Mat, Jason R, and Sarah, and to the boards from AIGA Connecticut, Rhode Island, Maine, and NH/VT, and everyone else who lent a hand in any way. It was a really great experience.

Post updated in January 2021 with text edits and minor photo edits. Broken links have been fixed. This post was originally published at theexhibitdesigner.com on 24 April 2012.

Say Something, the wrap-up

I was honored to be involved with the Say Something Poster Project* by lending my exhibit design services to the first ever Poster Show, a fundraiser for Boston-based nonprofit The Home for Little Wanderers.

sspp_01.jpg

This was a case of less being much more. Initially I started with grand ideas to incorporate elements from the website branding into the three-dimensional exhibit space, but gradually I whittled down the exhibition design to its essence, to give the 25 poster finalists all the attention (and to make the installation manageable).

sspp_02.jpg
sspp_05.jpg

Posters were hung using 1.25" bulldog clips held to the wall with L pins. Labels were laser prints mounted to black illustration board and attached to the wall top and bottom with L pins. (And because I’m quite particular, you bet all the white paper edges were hit with a deft stroke of gray marker.) The large script title (“the poster show”) was drawn by illustrator Chris Piascik. I put it on the wall in contour-cut vinyl.

sspp_06.jpg

Guests voted for their ten favorite posters from the 25 finalists on view at the event. I designed the voting sheet.

sspp_57.jpg
ssps4_crop.jpg

Below is Mat Budelman, with his poster Think Half Full, one of the winning entries. Kudos to the finalists and winners, the volunteers, and to organizer Jason Stevens. Ben Gebo shot these event photos, and was also, incidentally, the photographer for the event I organized for Friday, AIGA BoNE Show’s “Meet the Judges.”

Post updated in January 2021. Broken links have been fixed or replaced with archived URLs, courtesy of archive.org. This post was originally published at theexhibitdesigner.com on 4 March 2011.
*Archived website leads to the second Say Something Poster Show; the first is no longer available online.

Old Faithful Visitor Education Center (Happy Holidays)

Work shown was completed while I was a designer at Christopher Chadbourne & Associates.

This vintage Yellowstone ornament, a gift from my dad, holds extra significance because of my work on the design of the Old Faithful Visitor Education Center in Wyoming. The Education Center held its Dedication Ceremony and Grand Re-Opening earlier this year, on August 25.

000 yellowstone COMP_0106_o.jpg

The Old Faithful Visitor Education Center teaches the science behind Yellowstone National Park’s stunning hydrothermal and geological features.

As part of the Christopher Chadbourne & Associates design team, I worked on Design Development, and the Production Services phase. Ernesto Mendoza was the senior graphic designer.

Here’s a project description at SEGD that goes into detail about the design considerations and process, and an article from inhabitat with more photographs.

(The good photographs (i.e. those to the left and below, and the three at the bottom of this post) are by Jay Rosenblatt.)

023 yellowstone img_0150.jpg

I took on a lead design role for the Yellowstone is a Natural Laboratory area, and developed the visual concept, inspired by scientists’ gridded field notebooks. The entire exhibit, and this area in particular, used many interactive elements to explain complicated scientific concepts in an accessible way.

christine-lefebvre-yellowstone-visitor-center-title.jpg
IMG_2944.JPG
christine-lefebvre-yellowstone-visitor-center-lake.jpg
christine-lefebvre-yellowstone-visitor-center-norris.jpg

Here’s an elevation of the Norris Geyser Basin section (the graphic design was tweaked after this):

6.3 Norris Geyser.jpg
christine-lefebvre-yellowstone-visitor-center-interactive.jpg
christine-lefebvre-yellowstone-visitor-center-interactives.jpg
035 yellowstone _mg_3631.jpg
021 yellowstone img_0125.jpg
old-faithful08.jpg
042 yellowstone _mg_3658_o.jpg
old-faithful01.jpg

And because it’s fun to look back, here are some photos from a shop visit at Pacific Studio. It’s always exciting to see designs mocked up like this. (Not as exciting as the final exhibit, of course!) We used a lot of direct print on frosted P95 acrylic, and digital prints applied to sign blank (wrapped with an overlam), for graphic panels.

2010-06-28 12.57.54.jpg

Post updated in January 2021. Broken links have been fixed. This post was originally published at theexhibitdesigner.com on 26 December 2010.

2009 AIGA BoNE Show wins (another!) award

Exciting news: a project I worked on last year, the 2009 AIGA BoNE Show, has taken home another award!

As the exhibit designer, I worked with BoNE Show co-directors Jeff Stammen and Brandon Bird, to step up and shake up the biennial, Boston-based awards show/exhibition. It was a nearly year-long process to put it together and our goal throughout was to create something engaging and memorable. In the end, the feedback was glowing — everyone who went had the most fun at the show’s opening last June* — and we won a couple of design awards to boot.

In September, we received an AIGA (Re)designAward for Sustainable Design; the awards recognize social responsibility and environmental sustainability in design. We were one of 25 winners in 2009.

And last week at the 2010 SEGD Conference, we were honored with an SEGD Design Award, in the “Lot With a Little” category.

*Some blog post mentions: Common Content | Hart-Boillot | MIT Press | Pinkergreen | South of the Sahara

But — you ask — what exactly is this BoNE Show?

The BoNE (Best of New England) [Design] Show is a biennial competition, exhibition, and fundraiser to benefit AIGA’s Boston chapter. Our theme for 2009 was Community. While the primary purpose of the exhibition was to showcase the 49 winning design pieces, the planning team (myself included) also wanted the experience to engage, educate, and help designers to feel more connected to their design community. One aspect of that was re-branding the BoNE Show into B(oNE) — as in “be one” — with the tagline, “One Region. One community.”

Thirteen local designers, design firms, and artists were commissioned to build large dimensional letter sculptures that together spelled out AIGA B(oNE) SHOW. (top photo) This became a centerpiece of the exhibition, and the letters were auctioned off at the opening reception.

boneshow2009_4.jpg
boneshow2009_10.jpg

My goal was to create an exhibition that would celebrate the competition winners and also the New England design community as a whole. To push the Community theme, I created an infographic wall about the AIGA in New England, including chapter sizes, locations, and other basic information.

boneshow2009_11.jpg

A second infographic wall — B(oNE) Show Deconstructed — provided a glimpse into the creation of the exhibition, including statistics about the designers who entered work in the competition and the designers who won recognition.

boneshow2009_14.jpg
boneshow2009_13.jpg
boneshow2009_12.jpg

Another area of the exhibition gave visitors the opportunity to share their ideas of what it takes to “B” a great designer — by contributing to a wall of B (fill-in-the-blank) speech-bubble directives. Some were earnest; others humorous.

I sourced environment-friendly and local materials, with the help of my design team. Graphics were printed with UV-curing ink on recycled chlorine-free kraft paper, at a printer located five miles from the gallery — or they were drawn by hand. Discarded furniture taken off the street, piles of cardboard collected from area businesses, an old door and a roll of twine found in a garage: “trash” that we salvaged and put to good use. The designs integrated mechanical fasteners and non-toxic glues. And to describe the “greenness” of the project for visitors to the exhibit, we created the Green Lounge, which was painted entirely in green, even the furniture. We used Old Fashioned Milk Paint — it's earth- and people-friendly, and manufactured nearby in Groton, MA. The Green Lounge also featured a slide show of past award winners to pull together BoNE Shows past and present, and add another element of Community.

boneshow2009_9.jpg
boneshow2009_8.jpg
boneshow2009_15.jpg

The biggest undertaking for the exhibition were the displays for the winning entries. We repurposed roughly 50 wooden shipping pallets collected from around the Boston area. These were deconstructed into planks, then planed and reconfigured into custom display fixtures — shelves, platforms, and frames — each designed to highlight the unique elements of the winning entry it held.

boneshow2009_18.jpg
boneshow2009_19.jpg
boneshow2009_16.jpg
boneshow2009_20.jpg
boneshow2009_17.jpg
boneshow2009_22.jpg
boneshow2009_21.jpg
boneshow2009_23.jpg

More photos of the exhibit here, and of the opening night here.

I’m going to take advantage of my blog/soapbox to also thank the many, many people who volunteered their time and helped put together the show: event photographer Christian Phillips; carpenter Mark Laning, Matt White of Dirk+Weiss (A/V), Melissa DePasquale (print design), Rochelle Ask, Colleen Baker, Rachel Boothby, Kimberly Cloutier, Luke Garro, Ben Gebo, Lee Gentry, Justin Hattingh, Andrea Kulish, Joe Liberty, Mike Mai, Cedric Mason, Julie Ogletree, Juliana Press, George Restrepo, Jason Rubin, Shaona Sen, Andrea Shorey, Drew Spieth, Sarah Tenney Stammen, Jason Stevens, Ken Takagi, Mende Williams, and Andrea Worthington. Thank you also to the AIGA Boston board — especially Suzanne McKenzie and Tracy Swyst — and the most excellent people at CCA, who were never-endingly supportive of Jeff and I as we in effect worked a second full-time job (they wrote this lovely news release about us) and our friends and families who had to deal with us in the duration. And here it is, our SEGD award:

Post updated in January 2021. Broken links have been fixed or replaced with archived URLs, courtesy of archive.org. This post was originally published at theexhibitdesigner.com on 17 June 2010.

The News 01.19.10

A compilation of design-related web finds.

L.A.’s Natural History Museum to receive $1-million grant for new permanent exhibition | Rising Currents: Projects for New York’s Waterfront — I’ve been following with interest the progress of the program and upcoming exhibit on the MoMA/P.S.1 blog | Towards a New Mainstream? On 27 January 2–3pm EST, a lecture by Gregory Rodriguez exploring demographic change in the Americas, cultural transformation, and the future of museums | Color Identifying System for the Color Blind | An Increasing Craving for Experiences; there has been a lot written lately about experience-over-stuff — hello, museums! | Light Touch interactive projector turns any flat surface into a touchscreen | An Architect’s Philosophy of Photography | Steffen Dam: Specimen Panels These are beautiful; very “natural history museum” | Barton’s Bonbonniere, From Architectural Forum c. 1952 — I love it! What a fun space.

AND NOW, something from the portfolio:

Work shown was completed while I was a designer at Christopher Chadbourne & Associates.

Perfectos.jpg

This time last year (January 17, 2009), the Tampa Bay History Center — designed by Christopher Chadbourne & Associates — held its grand opening in downtown Tampa, Florida. I worked closely with the project’s senior graphic designer Jeff Stammen on design development.

(Photo above and first three photos below, courtesy Tampa Bay History Center.)

Cattle.jpg
Container.jpg
07 Tampa Bay History Center 214_sm.jpg

I took a leading design role for the timeline (Your Tampa Bay) and the War Stories gallery. Below is my sketch of the War Stories gallery, and below that, a photo I took during installation — hence the empty case.

theexhibitdesigner_TBHC-war-stories-install.jpg

All the graphics in this museum were designed with both English and Spanish text. I love the challenge of designing multilingual graphics.

I was also responsible for Construction Administration, and supervised the exhibit installation. I love shop visits, site visits, inspecting fabrication samples … all of that. What happened with the Tampa installation was a little … let’s just say, complicated. The local fabricator, Creative Arts, was fantastic and saved the installation day in a lot of ways. I ended up effectively living in a hotel room for a couple weeks during the tail end of installation — much longer than my trip to Tampa was supposed to be. It was quite the learning experience. In hindsight, I can say I had fun.

(Photo above and photo below, courtesy Tampa Bay History Center.)

Your_Tampa_Bay.jpg
tampa_092.JPG
tampa_290edit.jpg

Post updated in January 2021. Broken links have been fixed or replaced with archived URLs, courtesy of archive.org. This post was originally published at theexhibitdesigner.com on 19 January 2010.

A thought or two on curved reader rails

I have been working on some curved reader rails and I feel for anyone who has to design them regularly — they involve advanced geometric wizardry that can make your head spin. (Or not ... but actually, yes, they are tricky.)

Below are two curved reader rails in the Ocean Hall at the National Museum of Natural History in DC. On the left is a rail that looks as though its graphics were not laid-out correctly; I’d guess that the text blocks and graphic elements are angled, but not CURVED to match the round rail edges, which makes the graphic look a little wonky. Look specifically at the text “Meet Phoenix” — see how it angles toward the text block below it? (But how cute is that whale illustration?) On the right, from the same exhibit, another curved rail. It’s a much simpler design, and it works: just two lines of text, set on a baseline curved to the radius of the rail.

Below is a reader rail that I designed for the National Museum of the US Army in Fort Belvoir, Virginia. (We — Christopher Chadbourne & Associates — are still in Design Development so text and images are not final.)

It will ultimately surround a circular, glass-enclosed diorama. Every line of text is on its own track, curved to the radius of the rail; in fact, all graphic elements, including lines and images, have horizontal lines curved to that radius. It took a long time to lay this out.

curved rail2.jpg

Update, 2021: The museum is now open (!!) — but also temporarily closed due to Covid-19 — and you can see the round reader rail and diorama in the photo of the Cold War gallery on the NMUSA website.

Post updated in January 2021. Broken links have been fixed, replaced, or replaced with archived URLs, courtesy of archive.org. This post was originally published at theexhibitdesigner.com on 10 January 2010.

Why I hate vinyl, part 1

I hate applied vinyl. Vinyl, the adhesive-backed and ready-to-apply, custom-cut kind, is ubiquitous in museum exhibits. (Even in interior design, DIY vinyl wall decals are the hot new thing.)

There are benefits to using vinyl, I will admit. For example:
1. Vinyl letters are easy to apply and easy to remove, making them convenient for short-term, temporary exhibits. Just about anyone can apply vinyl to a wall.
2. Vinyl is cheap. For small runs and one-offs it is much less expensive to use vinyl over silkscreen because of silkscreen’s initial set-up costs and the time and skill required to do it correctly.
3. Vinyl can be applied to most any type of surface, and to irregular shapes.

But I'm not condoning the use of vinyl in exhibits, or on your bedroom wall. This post is about how much I hate vinyl, after all. Some aesthetic reasons:

1. Vinyl is shiny. (If you are intentionally going for reflections, disregard this reason.) Vinyl does come in matte finishes — just as it comes in different types based on the surface it will be applied to, the environment it will live in, and the desired longevity — albeit with color options more limited than those for standard gloss finish. Basic, shiny vinyl? It catches the light in unappealing ways. It calls attention to itself, the material. It ruins perfectly good design.

2. Vinyl is easily damaged. People like to pick at things and if given the chance, if they think no one is looking, they will pick and scratch at exhibit graphics. Of course this applies to all graphics, not just the vinyl ones, but vinyl makes for an especially appealing target. If you are applying vinyl to glass, an easy way around this would be to apply it to the “second” or inside surface. If you’re applying vinyl to a wall, at a height within reach … good luck.

3. Vinyl will shrink and peel. It can only live on a wall for a finite amount of time. If the vinyl escapes being picked off, how long before it starts to peel off? I’ve seen varying claims about the lifespan of vinyl letters; the average run seems to be five years. If your exhibit is meant to be on view for longer than that you should probably consider other materials.

4. Vinyl comes in an infuriatingly limited selection of colors. (I have before changed a selected palette color in order to match what was available in vinyl. Ugh, so backwards.) You can have your vinyl custom-printed, either directly from the manufacturer or by your project printer/fabricator, but that typically comes with additional costs and lead times.

And then there are the environmental and health concerns about vinyl. To be continued.… (Update: Or not. I never wrote a Part 2.)

Post updated in January 2021 with text edits. Broken link has been replaced with archived URL, courtesy of archive.org. This post was originally published at theexhibitdesigner.com on 6 December 2009.

The digitally-printed looking glass

This past Wednesday I spent a couple of hours in the Build Boston exhibition hall, looking for exciting new materials. Build Boston is a convention and tradeshow for the design and construction industry. Last year, I went to the Greenbuild expo while it was in Boston — and there was a lot to see, and a lot to be inspired by, and a lot of neat samples with which to fill up my Greenbuild-branded reusable tote. I hoped to repeat that experience at Build Boston, but was mostly disappointed. Build Boston is more for those who are concerned with foundations and door jambs and other such stuff. Architects, namely; not exhibit designers.

BUT! I did find one product that I really like the look of: “Alice” direct-to-glass digital printing. Alice is the name of the printer, and it uses a “solvent-based, ceramic ink" to print onto tempered or laminated glass. It can print edge-to-edge on sheet glass up to 84" x 144". My understanding of the process is that the Alice printer uses frit (finely ground ceramic particles) mixed with pigments and a solvent. It shoots drops of the liquid frit onto the sheet of glass and then immediately heats it. The final printed glass is almost perfectly smooth — the graphic has literally been baked into it — which makes it scratch-proof and pick-proof. There doesn’t seem to be much limit to the ink opacity levels, or to color-matching, although it should be noted that it doesn’t use CMYK; its base enamel colors are black, white, blue, red, yellow, turquoise, green, orange, and “etch.” Overall, I was impressed with the vibrancy and crispness of the Alice-printed glass that I saw at the trade show. I’ve ordered a sample from the manufacturer, to take another, longer look at this stuff. If you have had any firsthand experience using it, please get in touch and let me know what you thought of it.

Post updated in January 2021 with minor text edits. This post was originally published at theexhibitdesigner.com on 21 November 2009.